- Help
- Grades
Report Cards
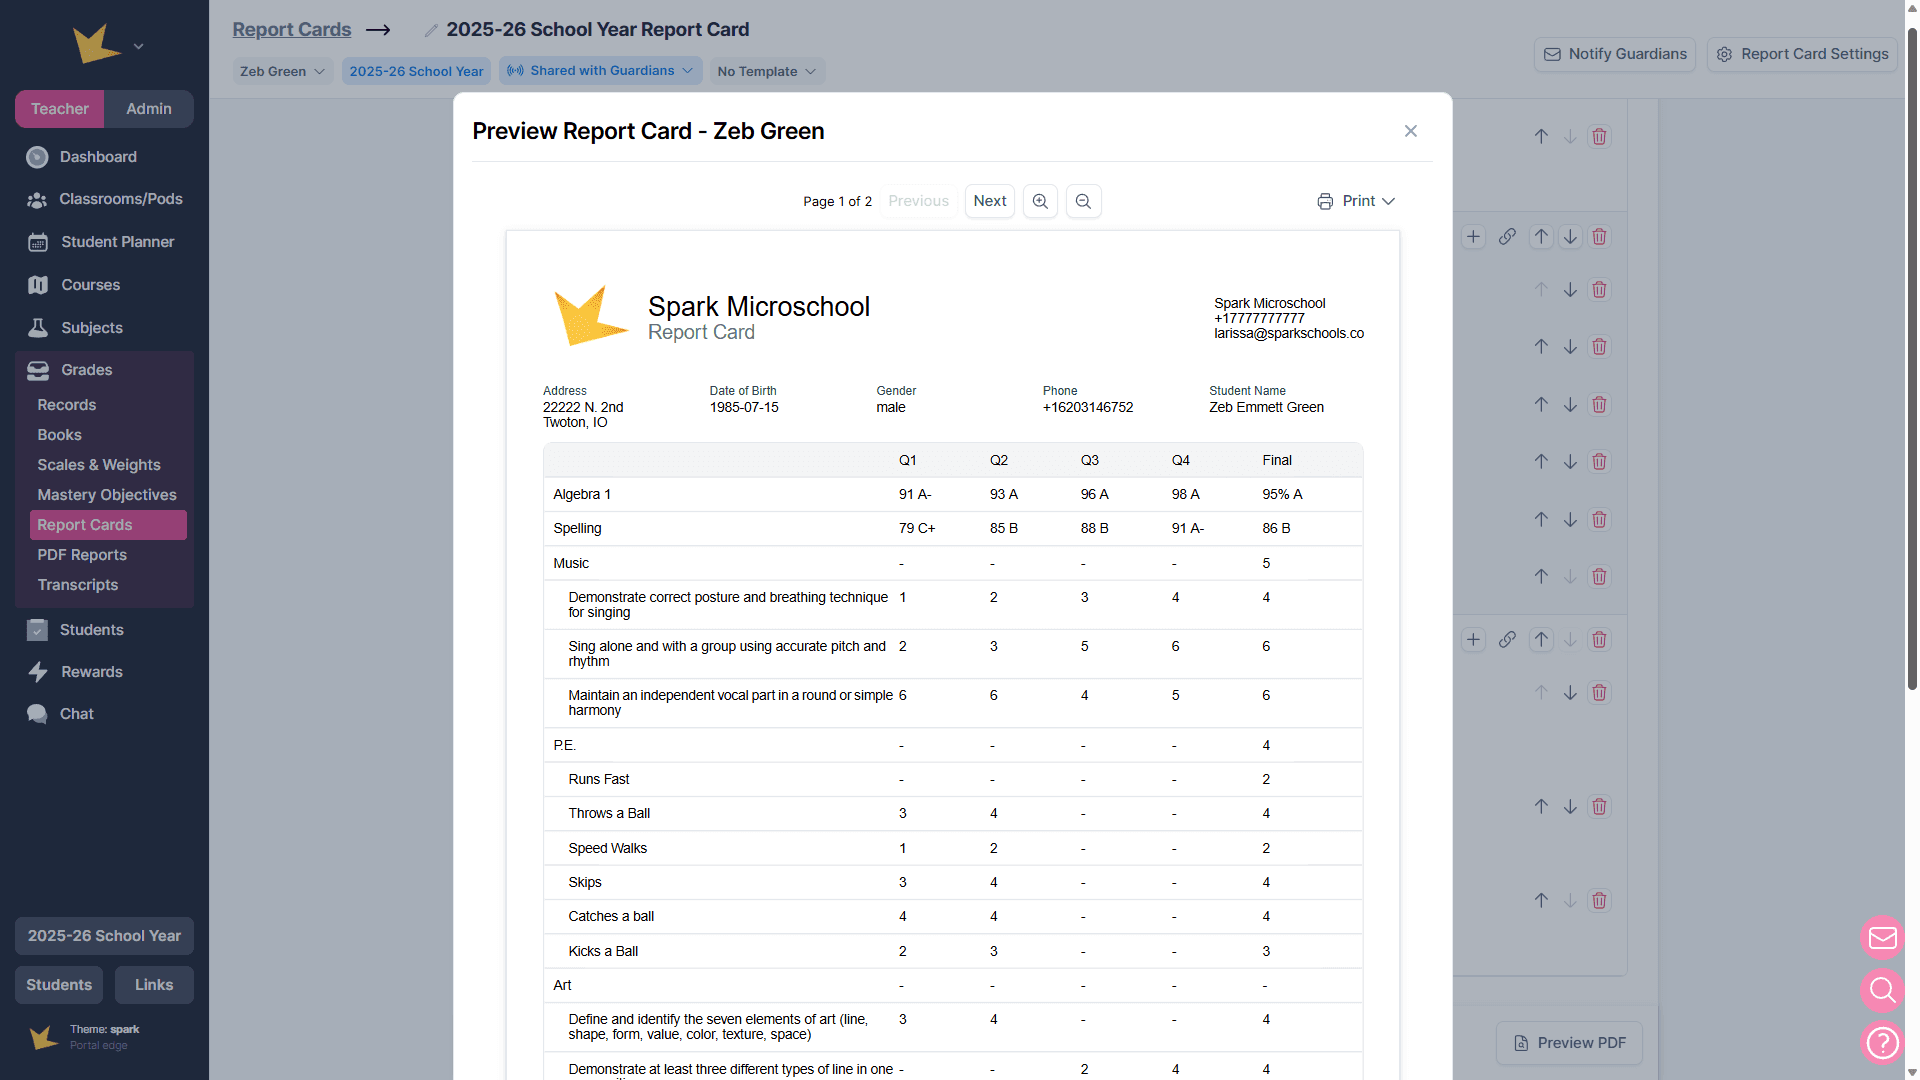
A report card is a summary of a student’s performance and progress during a specific grading period.
Report cards sync with data from Grade Records and can be updated easily as the academic term progresses. You may also enter grade data manually if desired. In addition to grades, other sections of the report card are customizable, including school and student information, attendance, instructor notes, and signature sections.
Once finalized, report cards can be shared with guardians through the Guardian Portal. They may also be downloaded or printed for your records.
Creating Report Cards
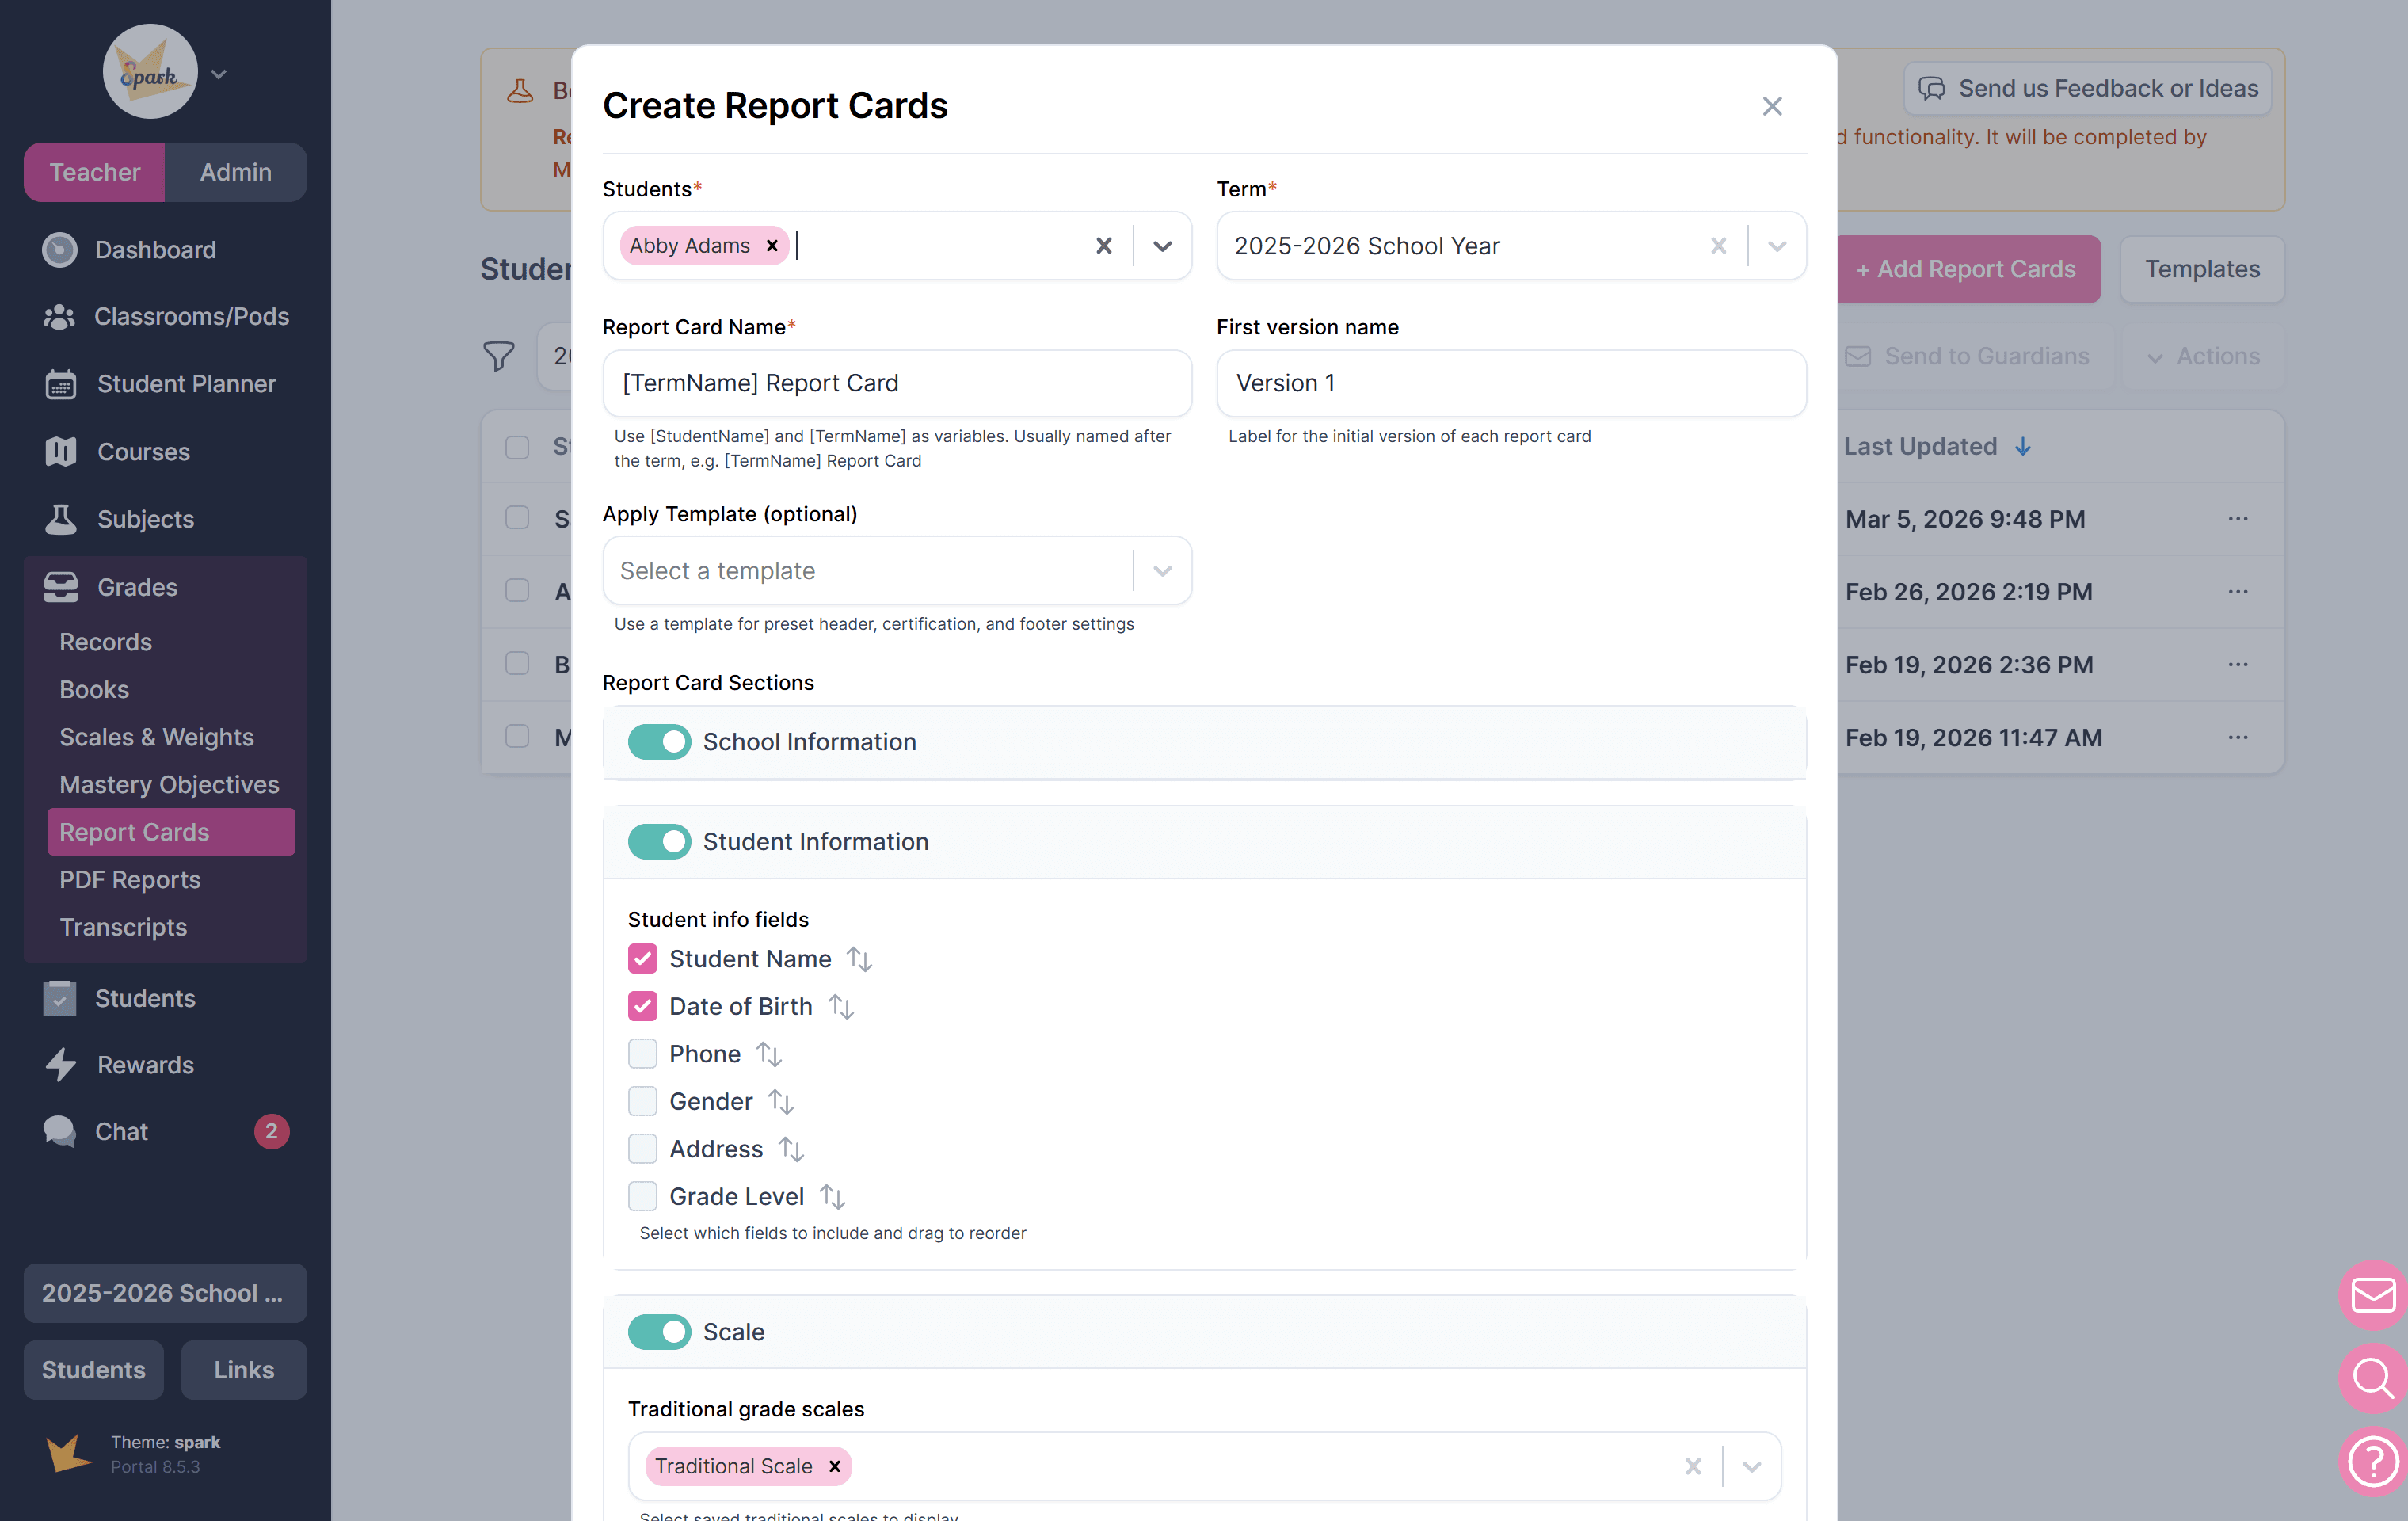
To create report cards:
- Navigate to Grades → Report Cards and click + Add Report Cards.
- Select the students and term.
- Enter a name for the report cards. (Variables may be used — see FAQs for details.)
- Name the first version. Multiple versions can be created throughout the term as new data is synced.
- Toggle sections on or off to control what appears on the report card. Sections can be added or removed later.
- Within each enabled section, select the data to display. Synced data can be customized if needed.
- Click Generate Report Cards.
Generated report cards will appear in a list on the Report Cards page. Click an individual report card to view or edit it, or select multiple report cards to make bulk updates.
Customizing Report Cards
Whether you generate report cards for one student at a time or for multiple students at once, a separate report card is created for each individual student. After generation, each report card can be customized independently.
To customize a report card:
- Open the student’s report card from the main Report Cards list.
- Make your desired changes.
- Click Save when finished. Save as a new version to preserve previous versions.
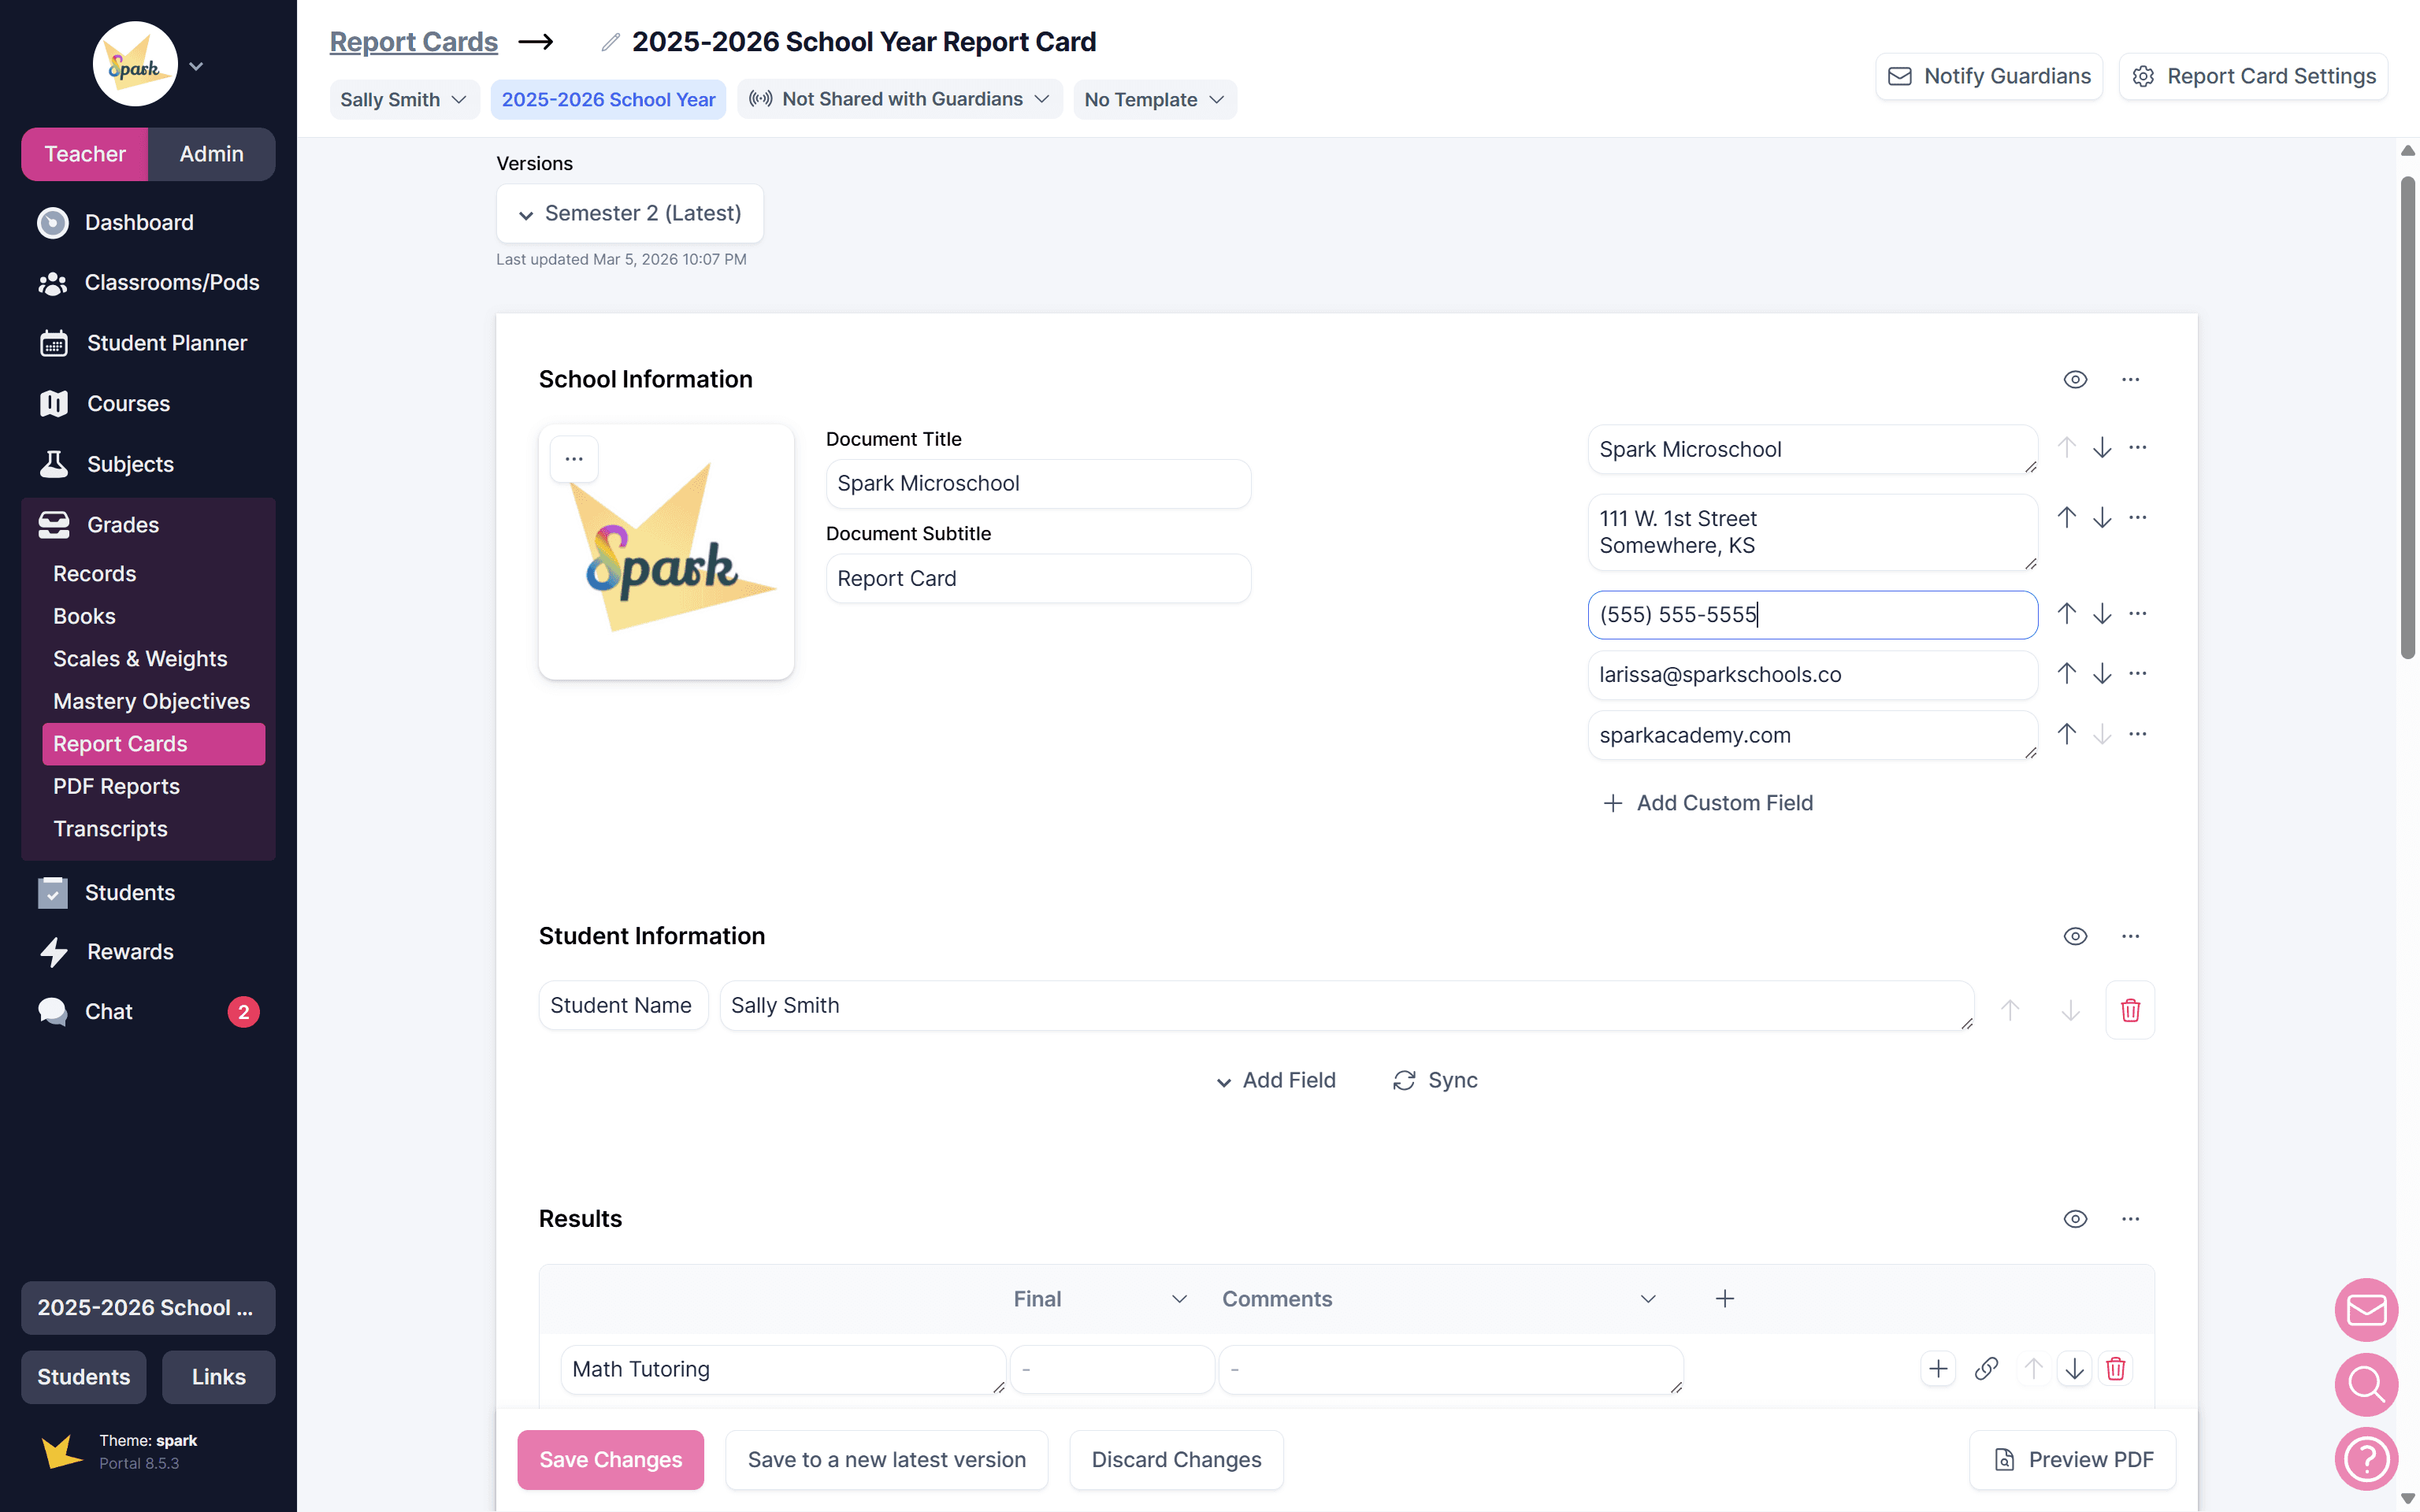
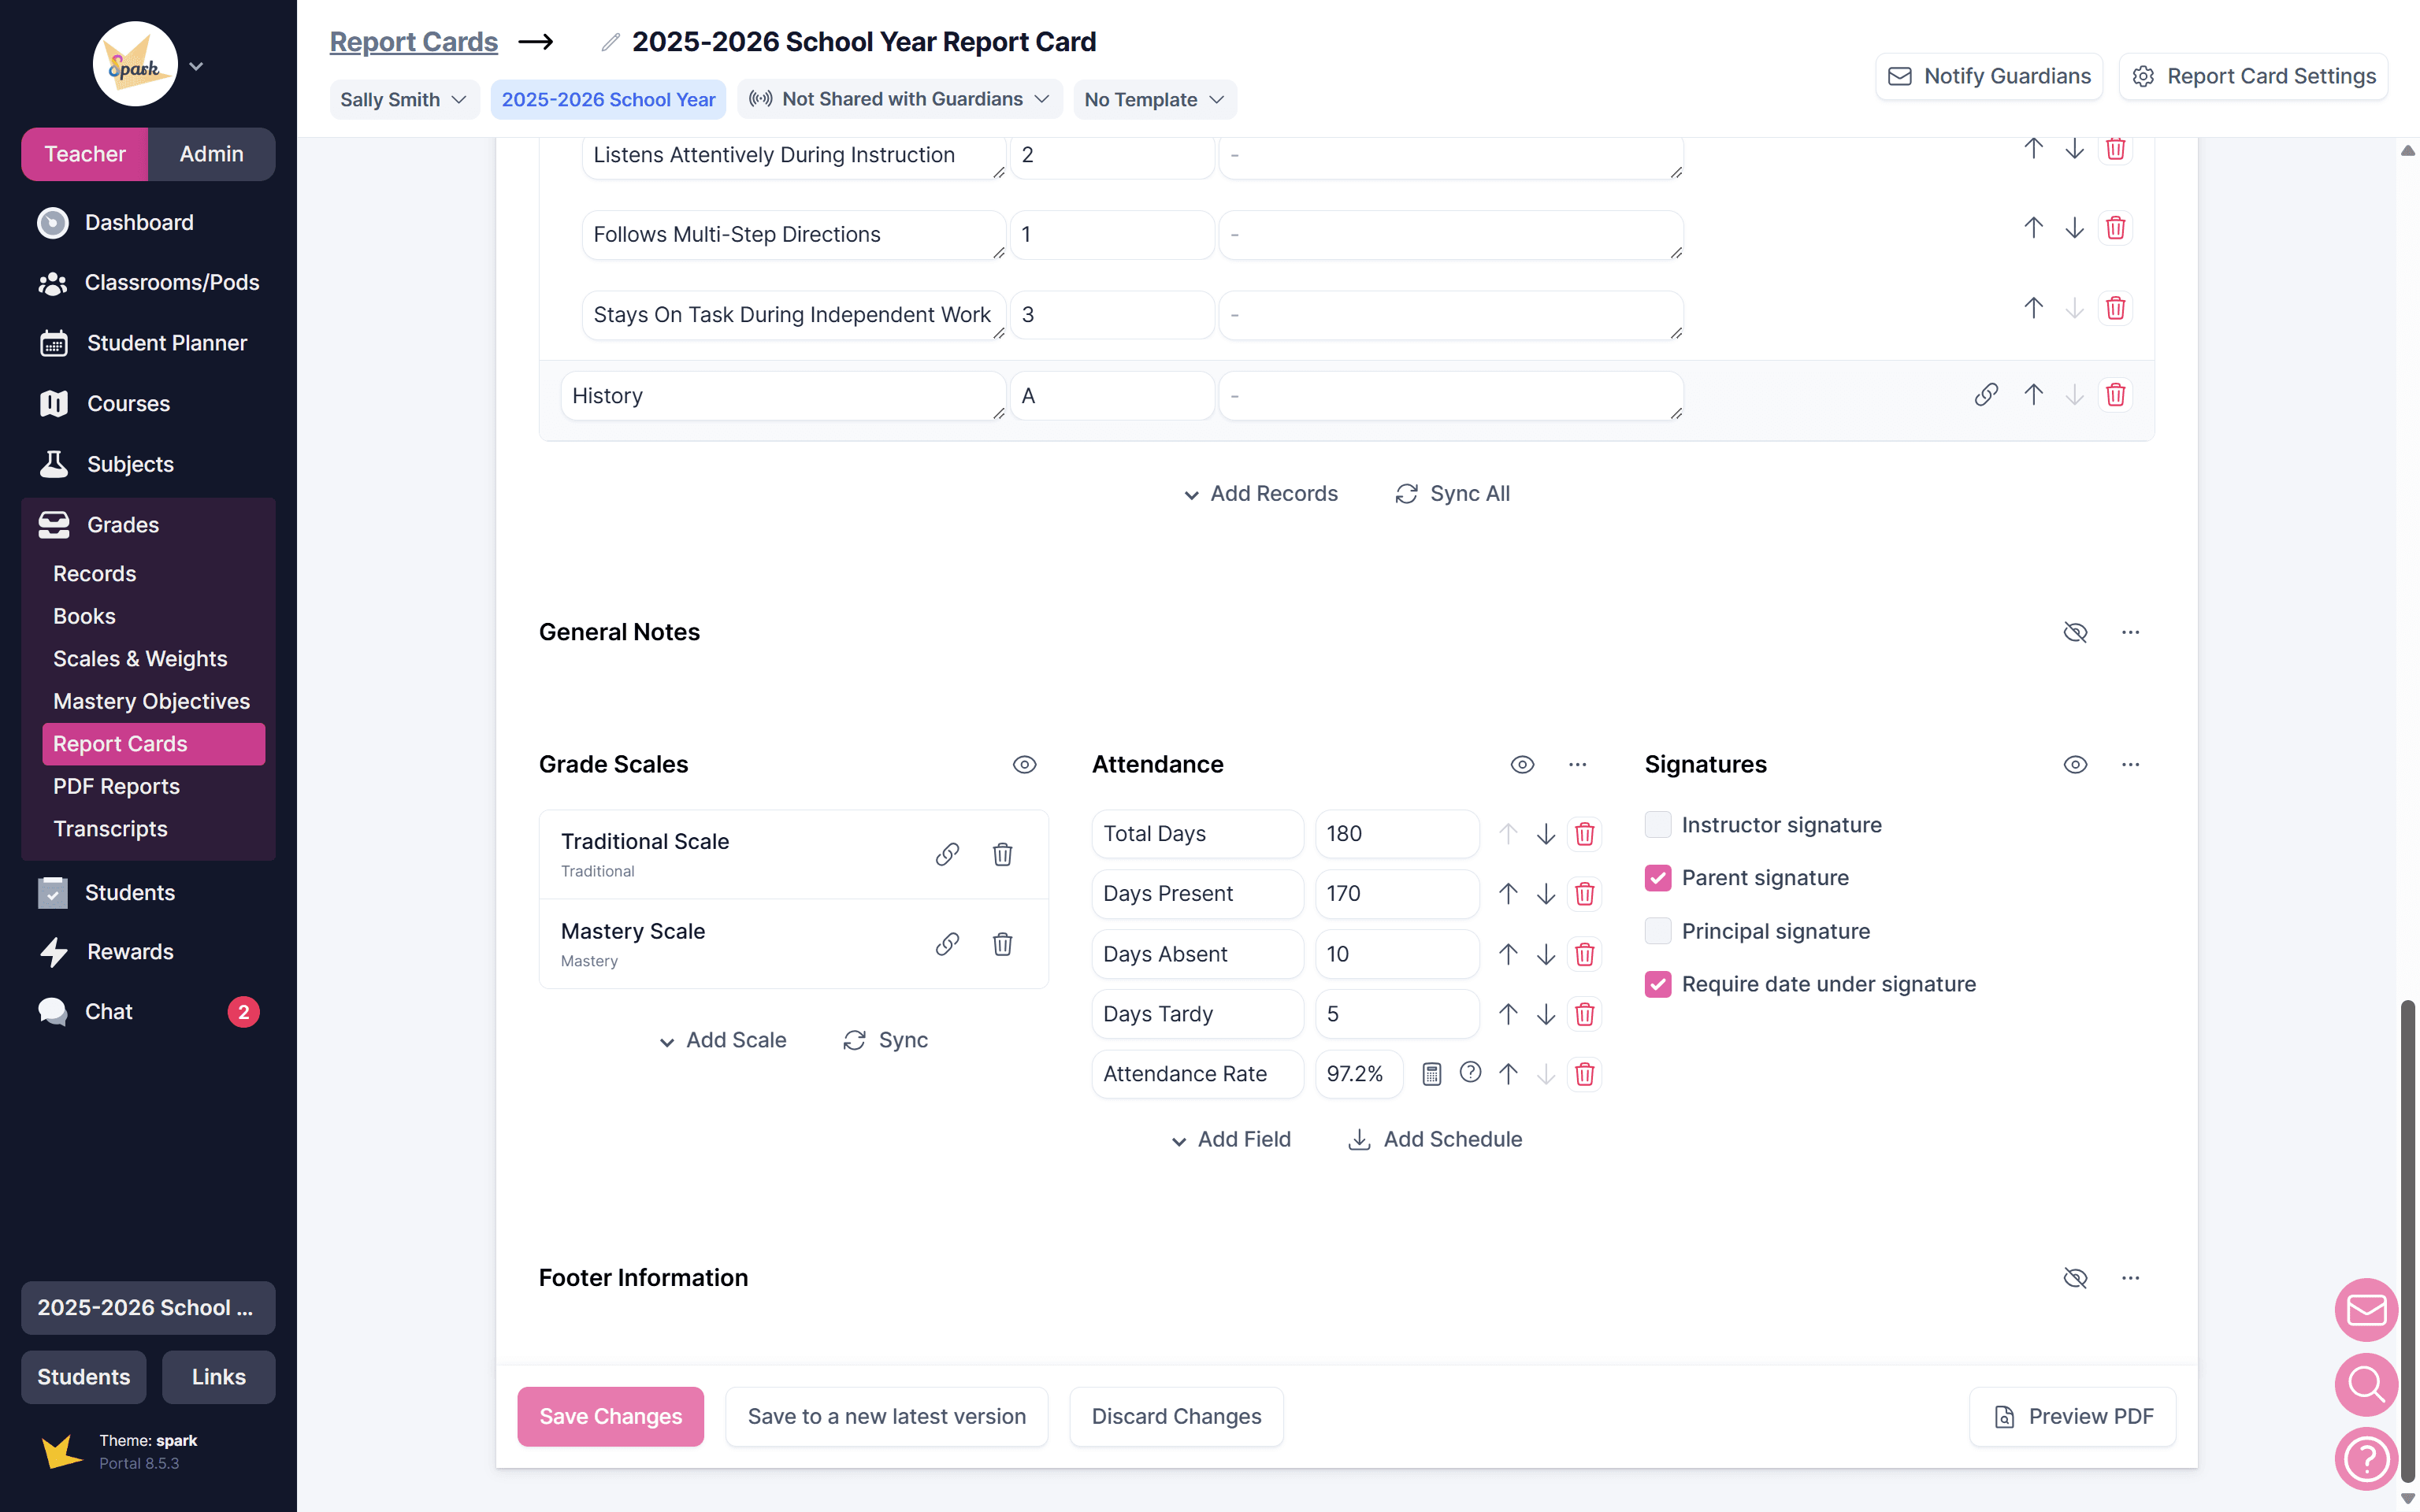
You can customize the report card in the following ways:
- Edit or add information within any section.
- Show or hide entire sections by clicking the eye icon.
- Re-sync data within supported sections to update information from grade records.
In the Results section (where grade results are displayed), you can:
- Add additional grade records to pull data from.
- Re-sync to update data from linked grade records.
- Add courses and grades manually (ad hoc).
- Add, remove, rename, or resize columns.
- Edit course names, learning objective titles, or grade scores directly.
- Reorder courses or learning objectives as needed.
Be sure to save your changes when finished. Save as a new version to preserve previous versions.
Using Templates
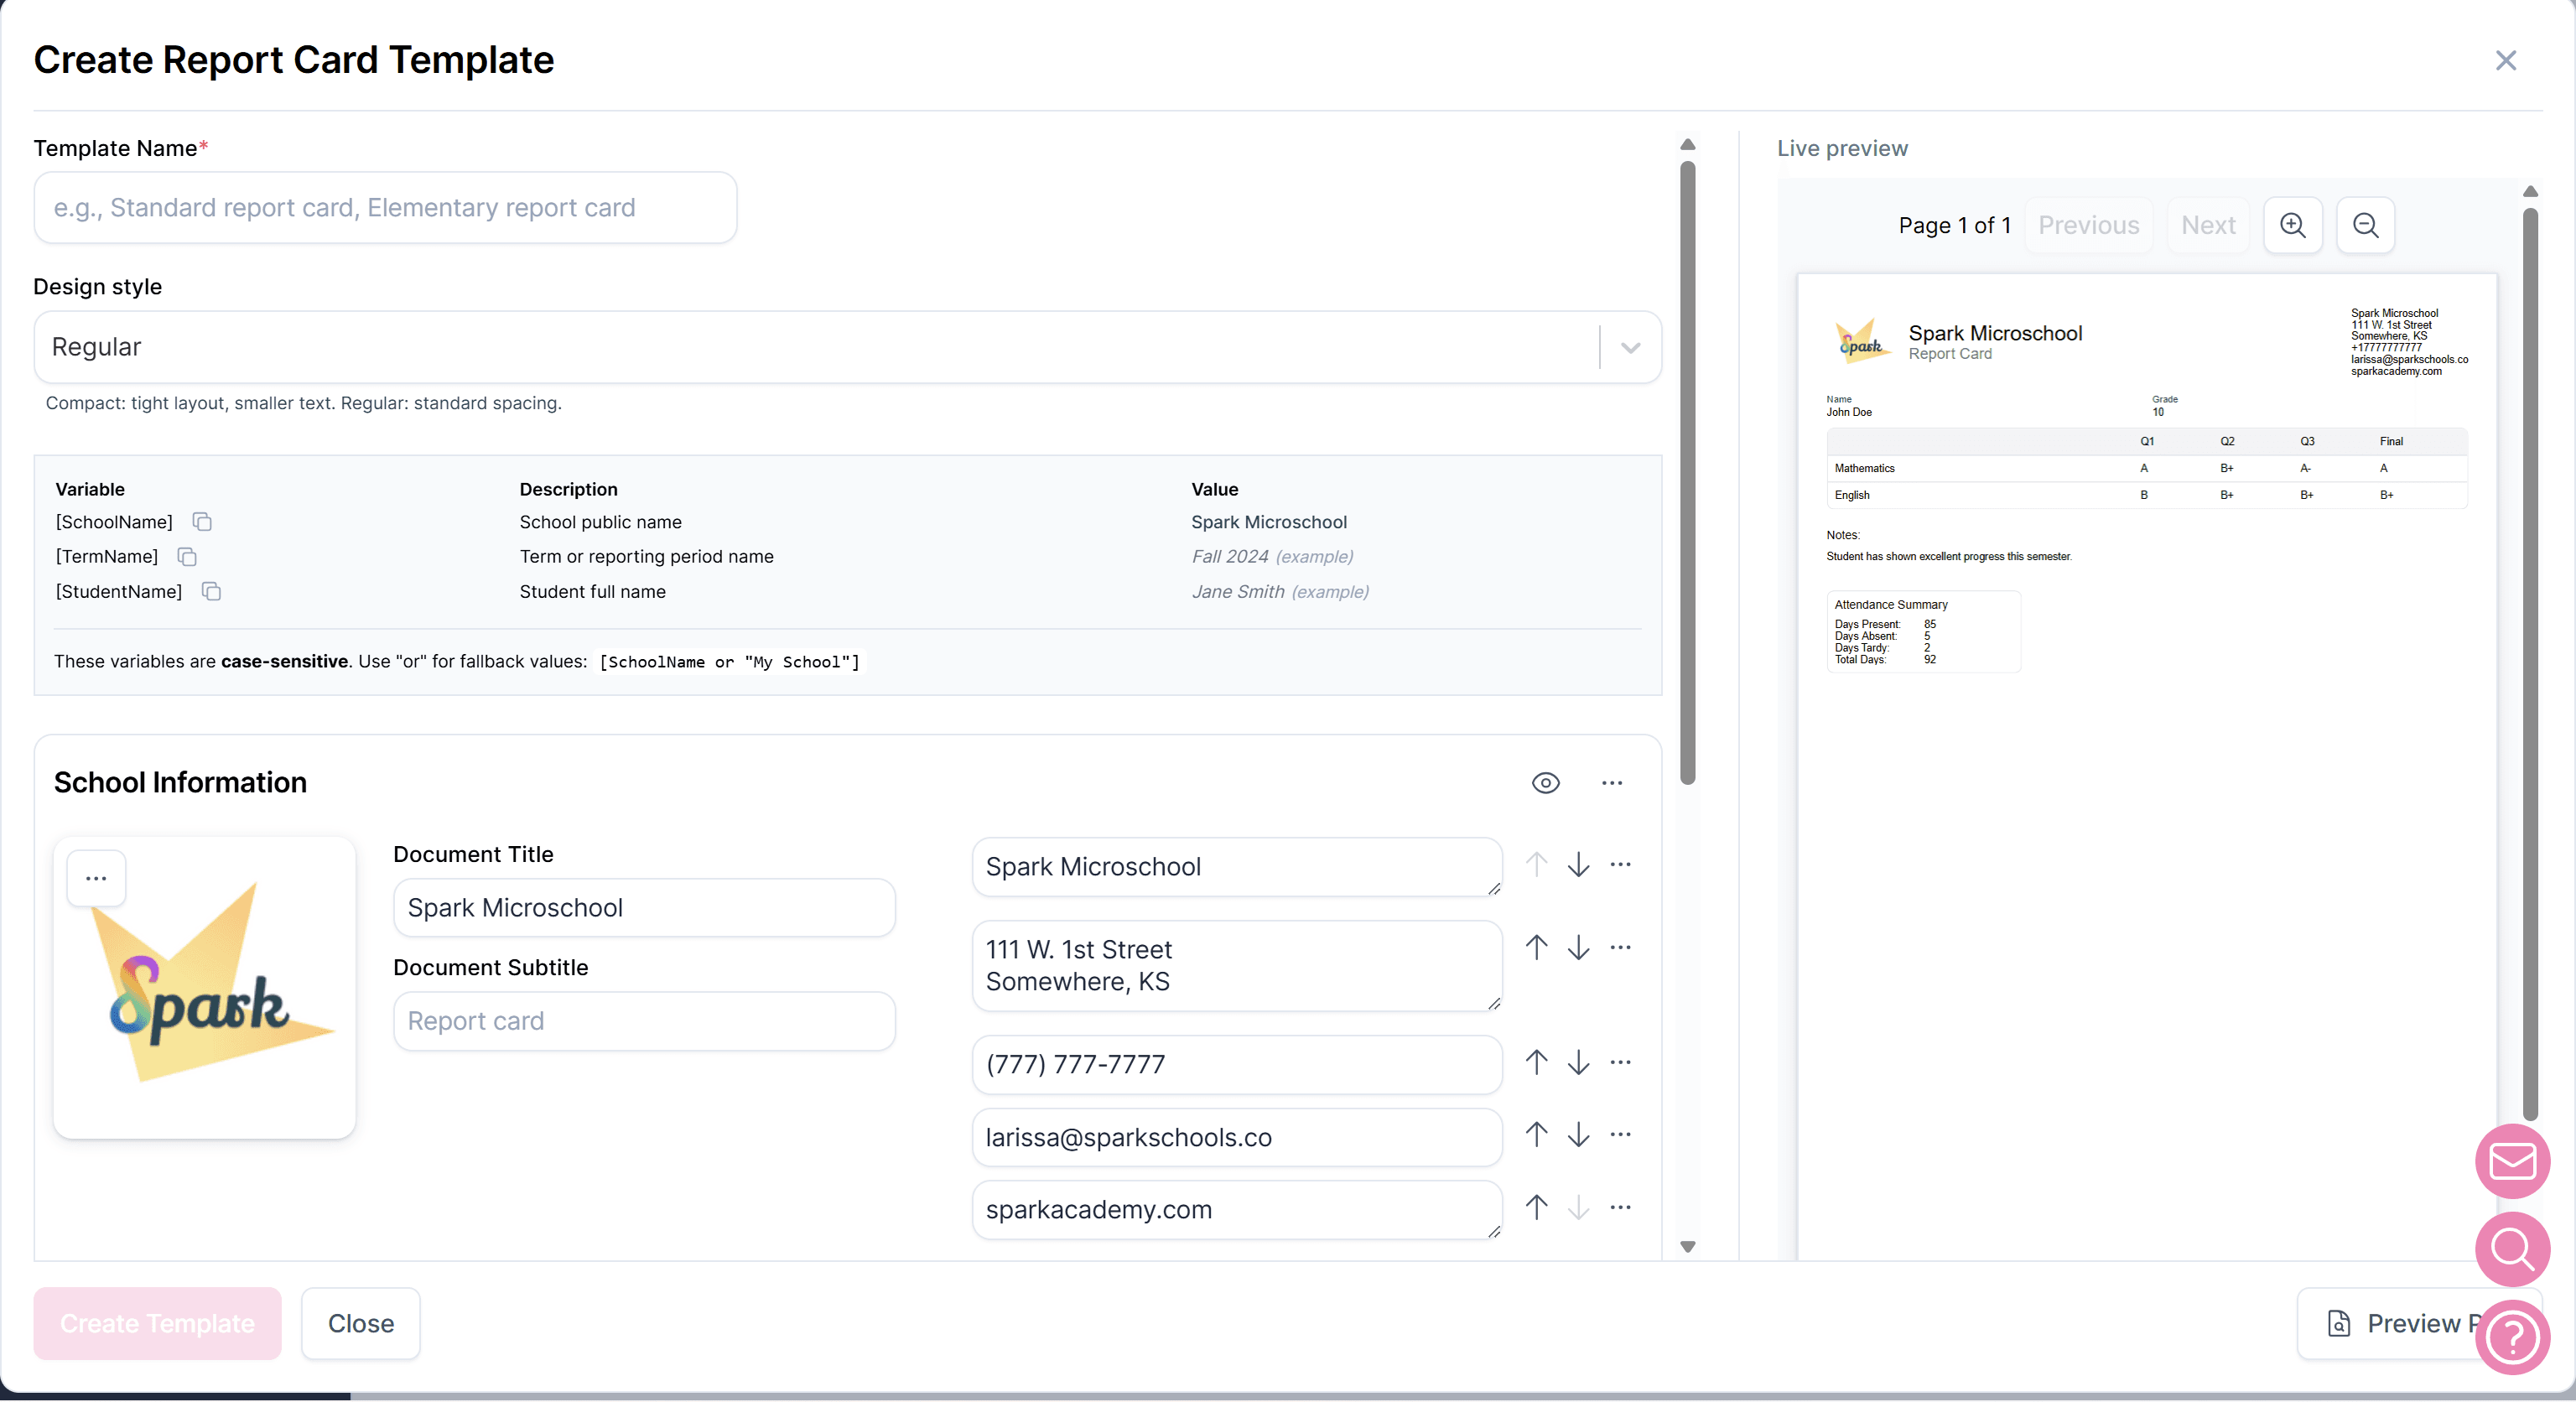
Report card templates allow you to customize your report cards in advance. Once created, a template can be applied to any report card, saving you from making the same changes repeatedly.
To create a template:
- From the main Report Cards page, click Templates.
This will open the Report Card Templates section in your School Settings. - Click + Add New Report Card Template.
- Enter a name for your template.
- Choose a design style:
- Regular — Standard spacing and font size. Suitable for most report cards.
- Compact — Smaller font size and tighter layout. Ideal for report cards that include many mastery objectives.
- Customize the available sections. A live preview of your template will appear on the right as you make changes.
- School Information
- Signatures
- Footer
- Click Create Template when finished.
Once created, templates can be applied in several ways:
- When creating a report card — Select the template during the creation process.
- To an individual report card — Click the Template badge at the top of the report card and select a template.
- To multiple report cards at once — Select the report cards from the list, click Update, and choose the template you would like to apply.
Updating Report Cards
As the academic term progresses, new data can be synced into existing report cards and saved as a new version. Creating a new version preserves previous report cards for your records.
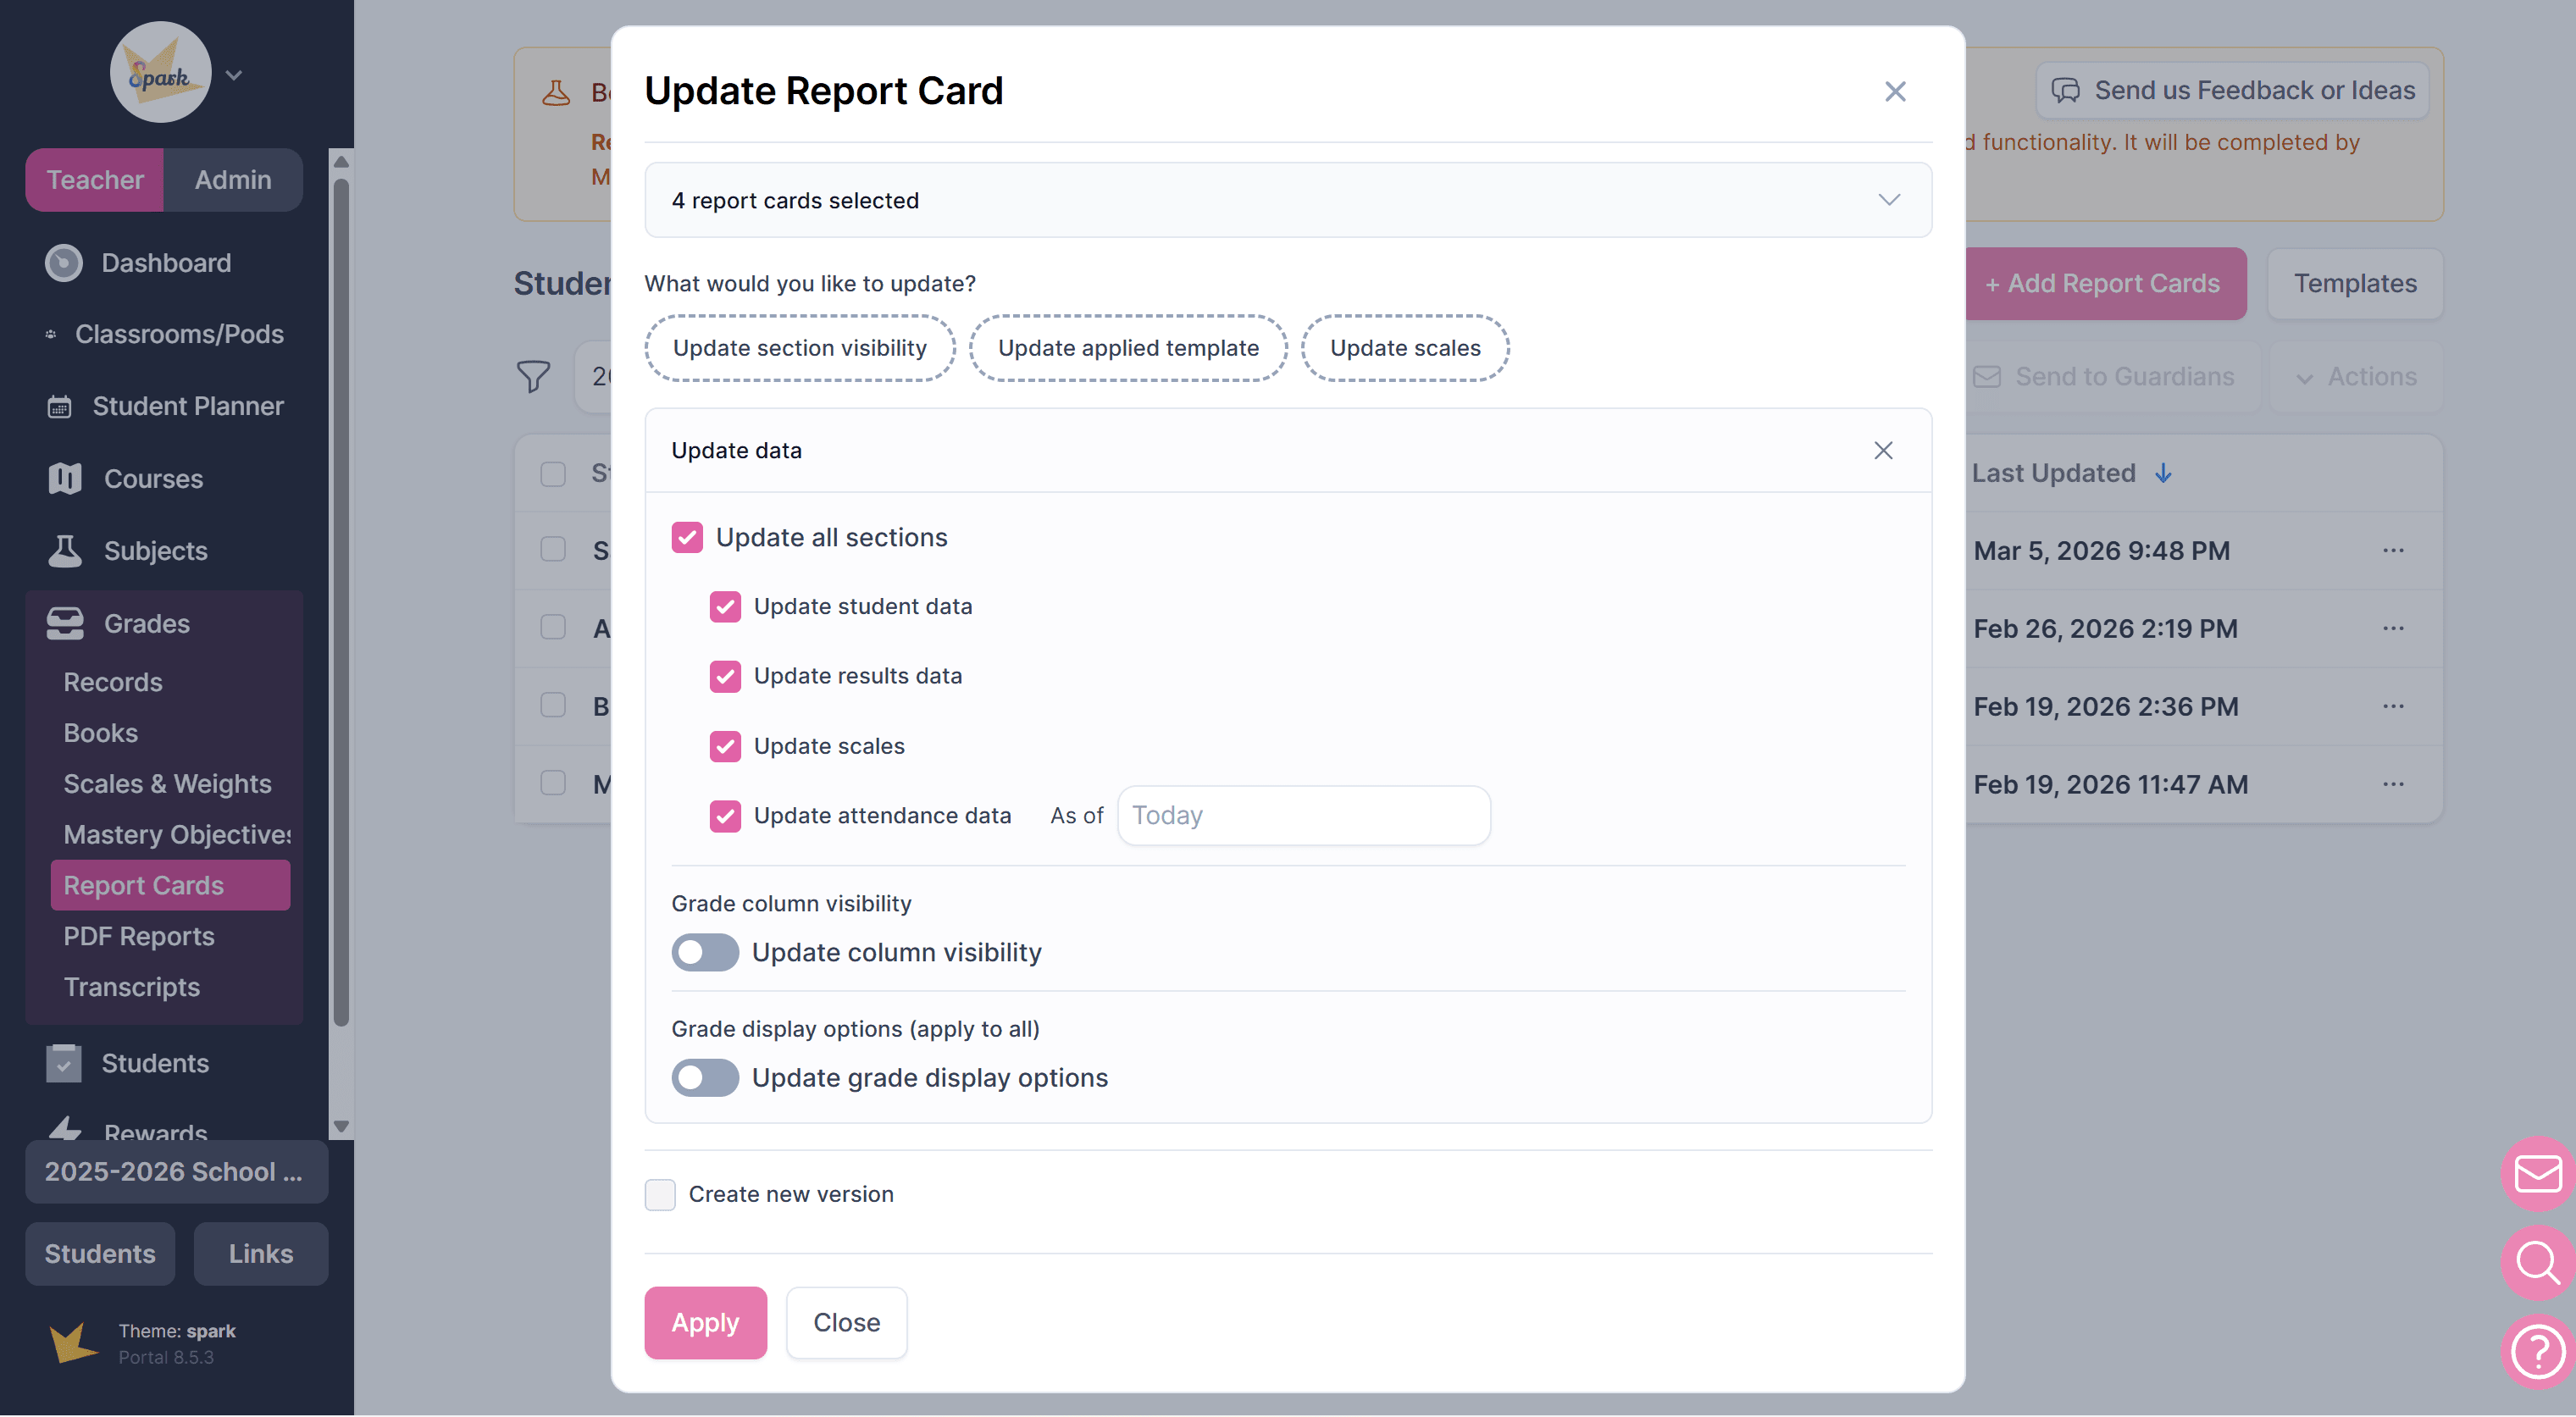
To update several report cards at the same time:
- From the Report Cards list, select the report cards you want to update.
- Click Update.
- Choose the section(s) you wish to update.
- If you are creating a new reporting period version (for example, updating for a new quarter), check the Create new version box.
- When checked, a new version will be created and the previous version will be preserved.
- When unchecked, the existing report cards will be updated in place.
You can also update a single student’s report card:
- Open the student’s report card from the list.
- Locate the section(s) that need updating and click Sync.
- For a course linked to a grade record, click the Link icon, then select Sync to refresh the data.
Be sure to save any changes before exiting the report card.
Report Card Versions
Each report card can have multiple versions. This allows teachers to maintain a single report card per student for the academic term while providing updated versions throughout the term to reflect student progress.
To create a new version for an individual report card:
- Open the report card.
- Update the data as needed.
- Click Save to New Latest Version.
Previous versions are preserved and can be accessed at any time.
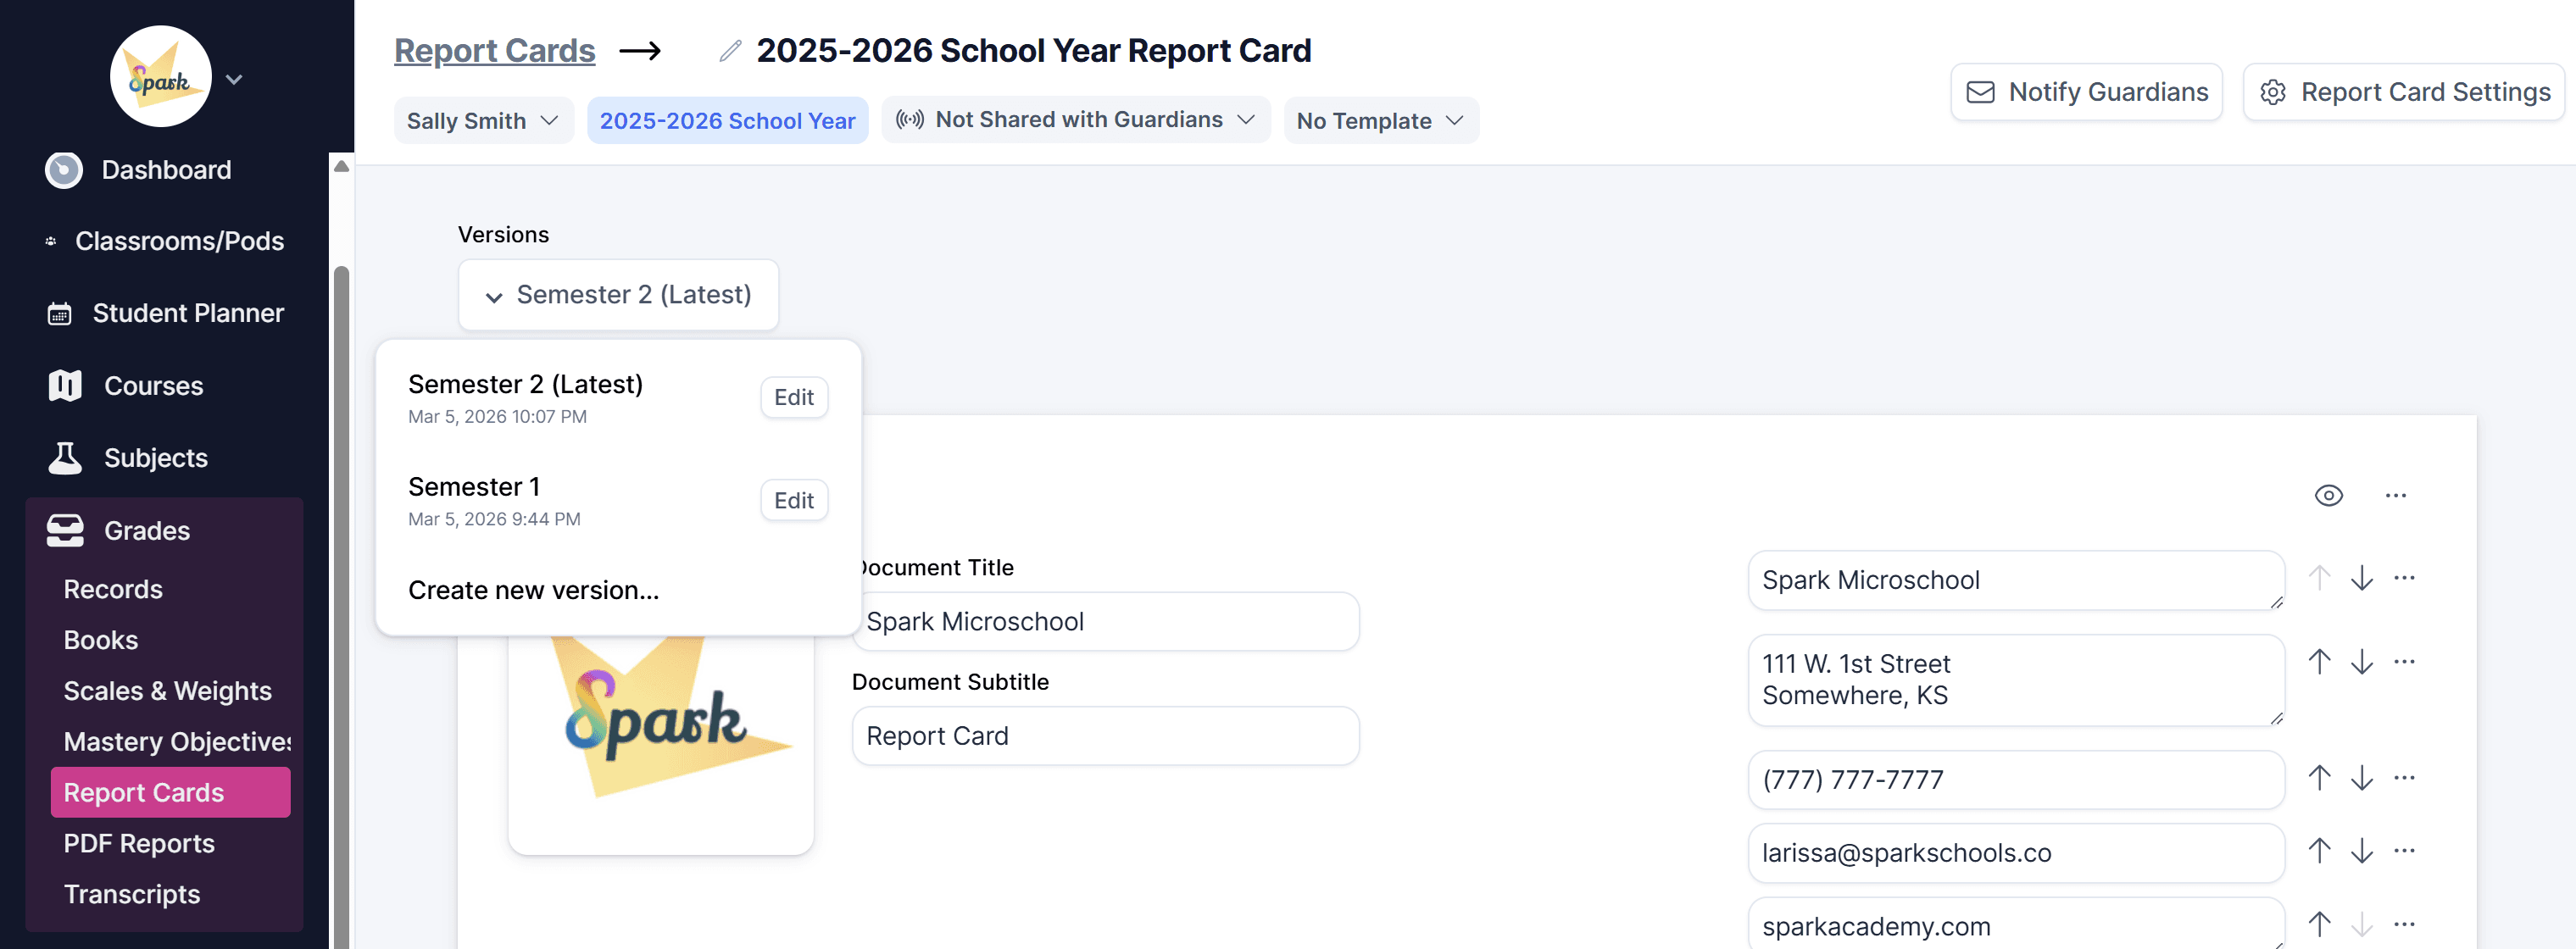
To view or edit past versions:
- Use the Versions dropdown at the top of the report card.
- Select the version you would like to view or edit.
To create new version for multiple report cards:
- From the main Report Cards page, select the report cards you wish to update.
- Click Update.
- Select the sections you would like to update.
- Check the box labeled Create new version.
- Click Update.
A new version will be created for each selected report card, while preserving all previous versions.
Sharing Report Cards
Once report cards have been created, they can be shared in several ways:
- Shared with guardians (via email and the Guardian Portal)
- Downloaded as PDFs
- Printed
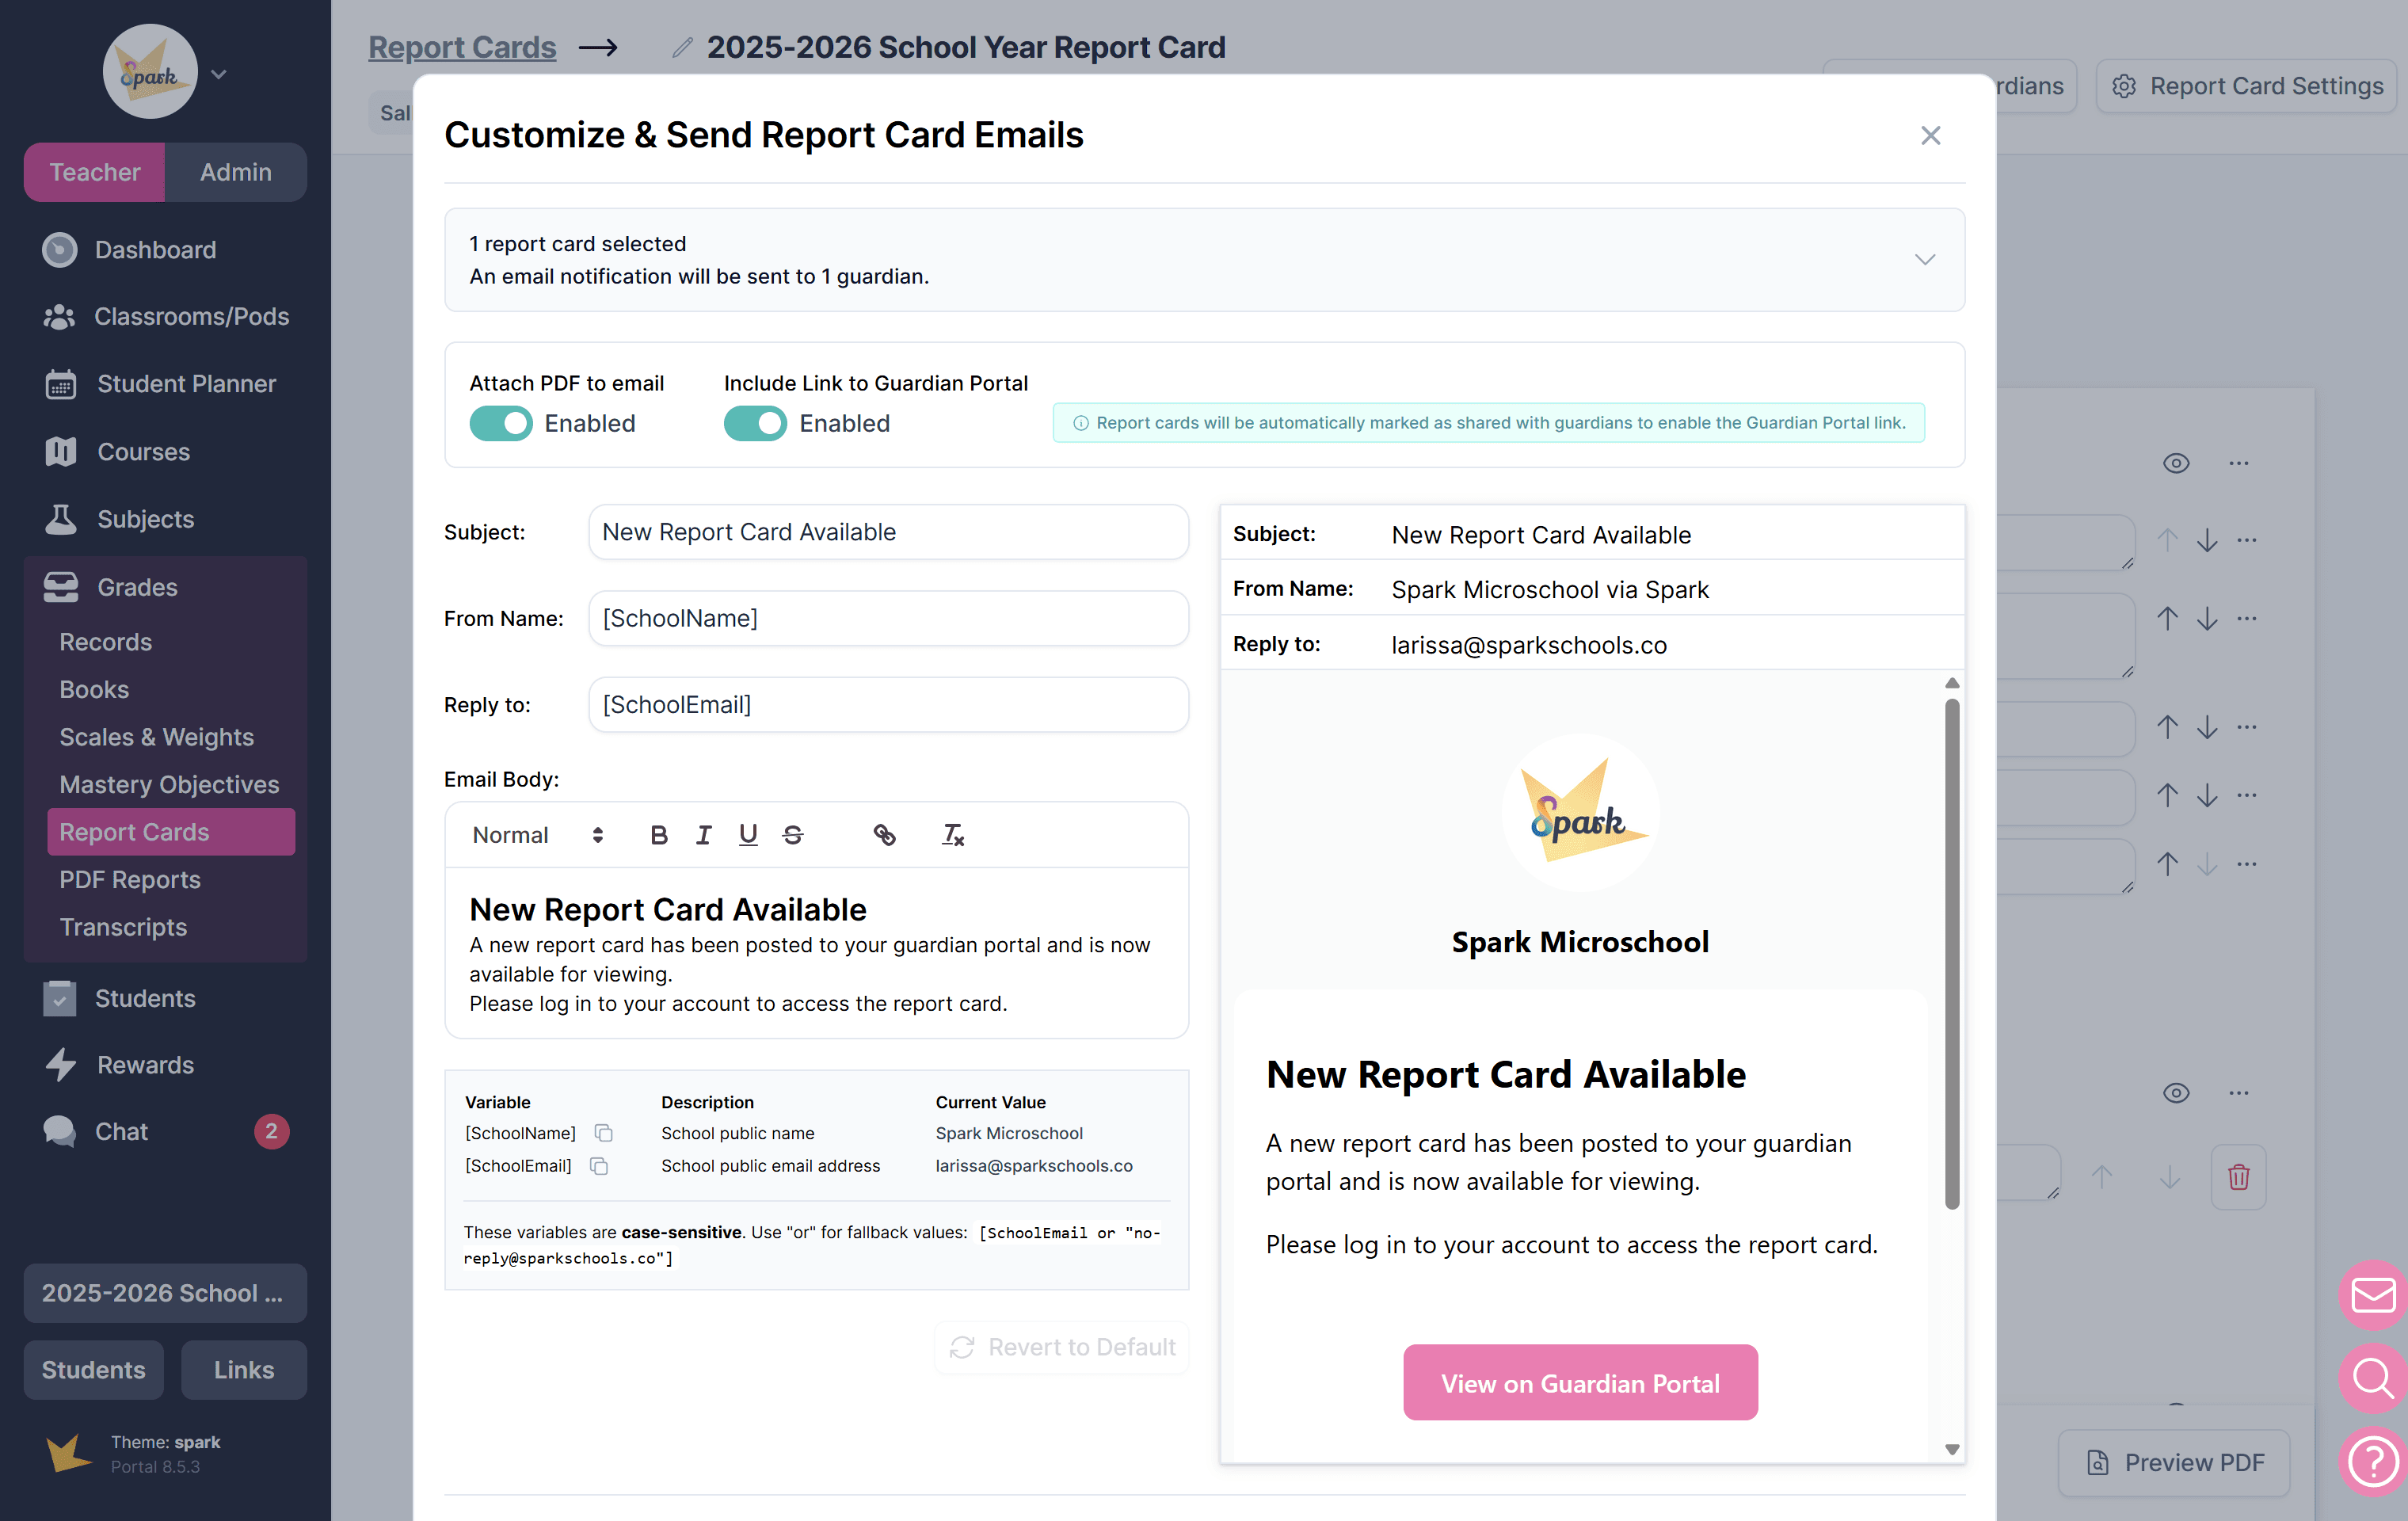
To send report cards to guardians:
- From the main Report Cards list, select the report cards you wish to send.
- Click Send to Guardians.
- Review the email message and make any necessary edits.
When sending, you may choose to:
- Attach the report card as a PDF
- Include a link for guardians to view the report card in their portal
Note: Each guardian will only receive the report card(s) for their own student(s).
To share an individual report card:
- Open the report card.
- Click the Not Shared with Guardians badge at the top and select Share with Guardians. This will post the card to the guardian portal.
- Or, click Notify Guardians in the top right corner. This enables you to send an email with the report card attached.
To download and/or print report cards:
- From the main Report Cards list, select the report cards you wish to download.
- Click Actions.
- Choose your preferred download option.
To download or print a single report card:
- Open the report card.
- Click Preview PDF.
- Download or print from the PDF view.