- Help
- Assignments
Creating Assignments & Goals
📣 Update Notice: The Student Planner was previously called "Assignments" or the "Assignment Calendar."
Creating Assignments and Goals
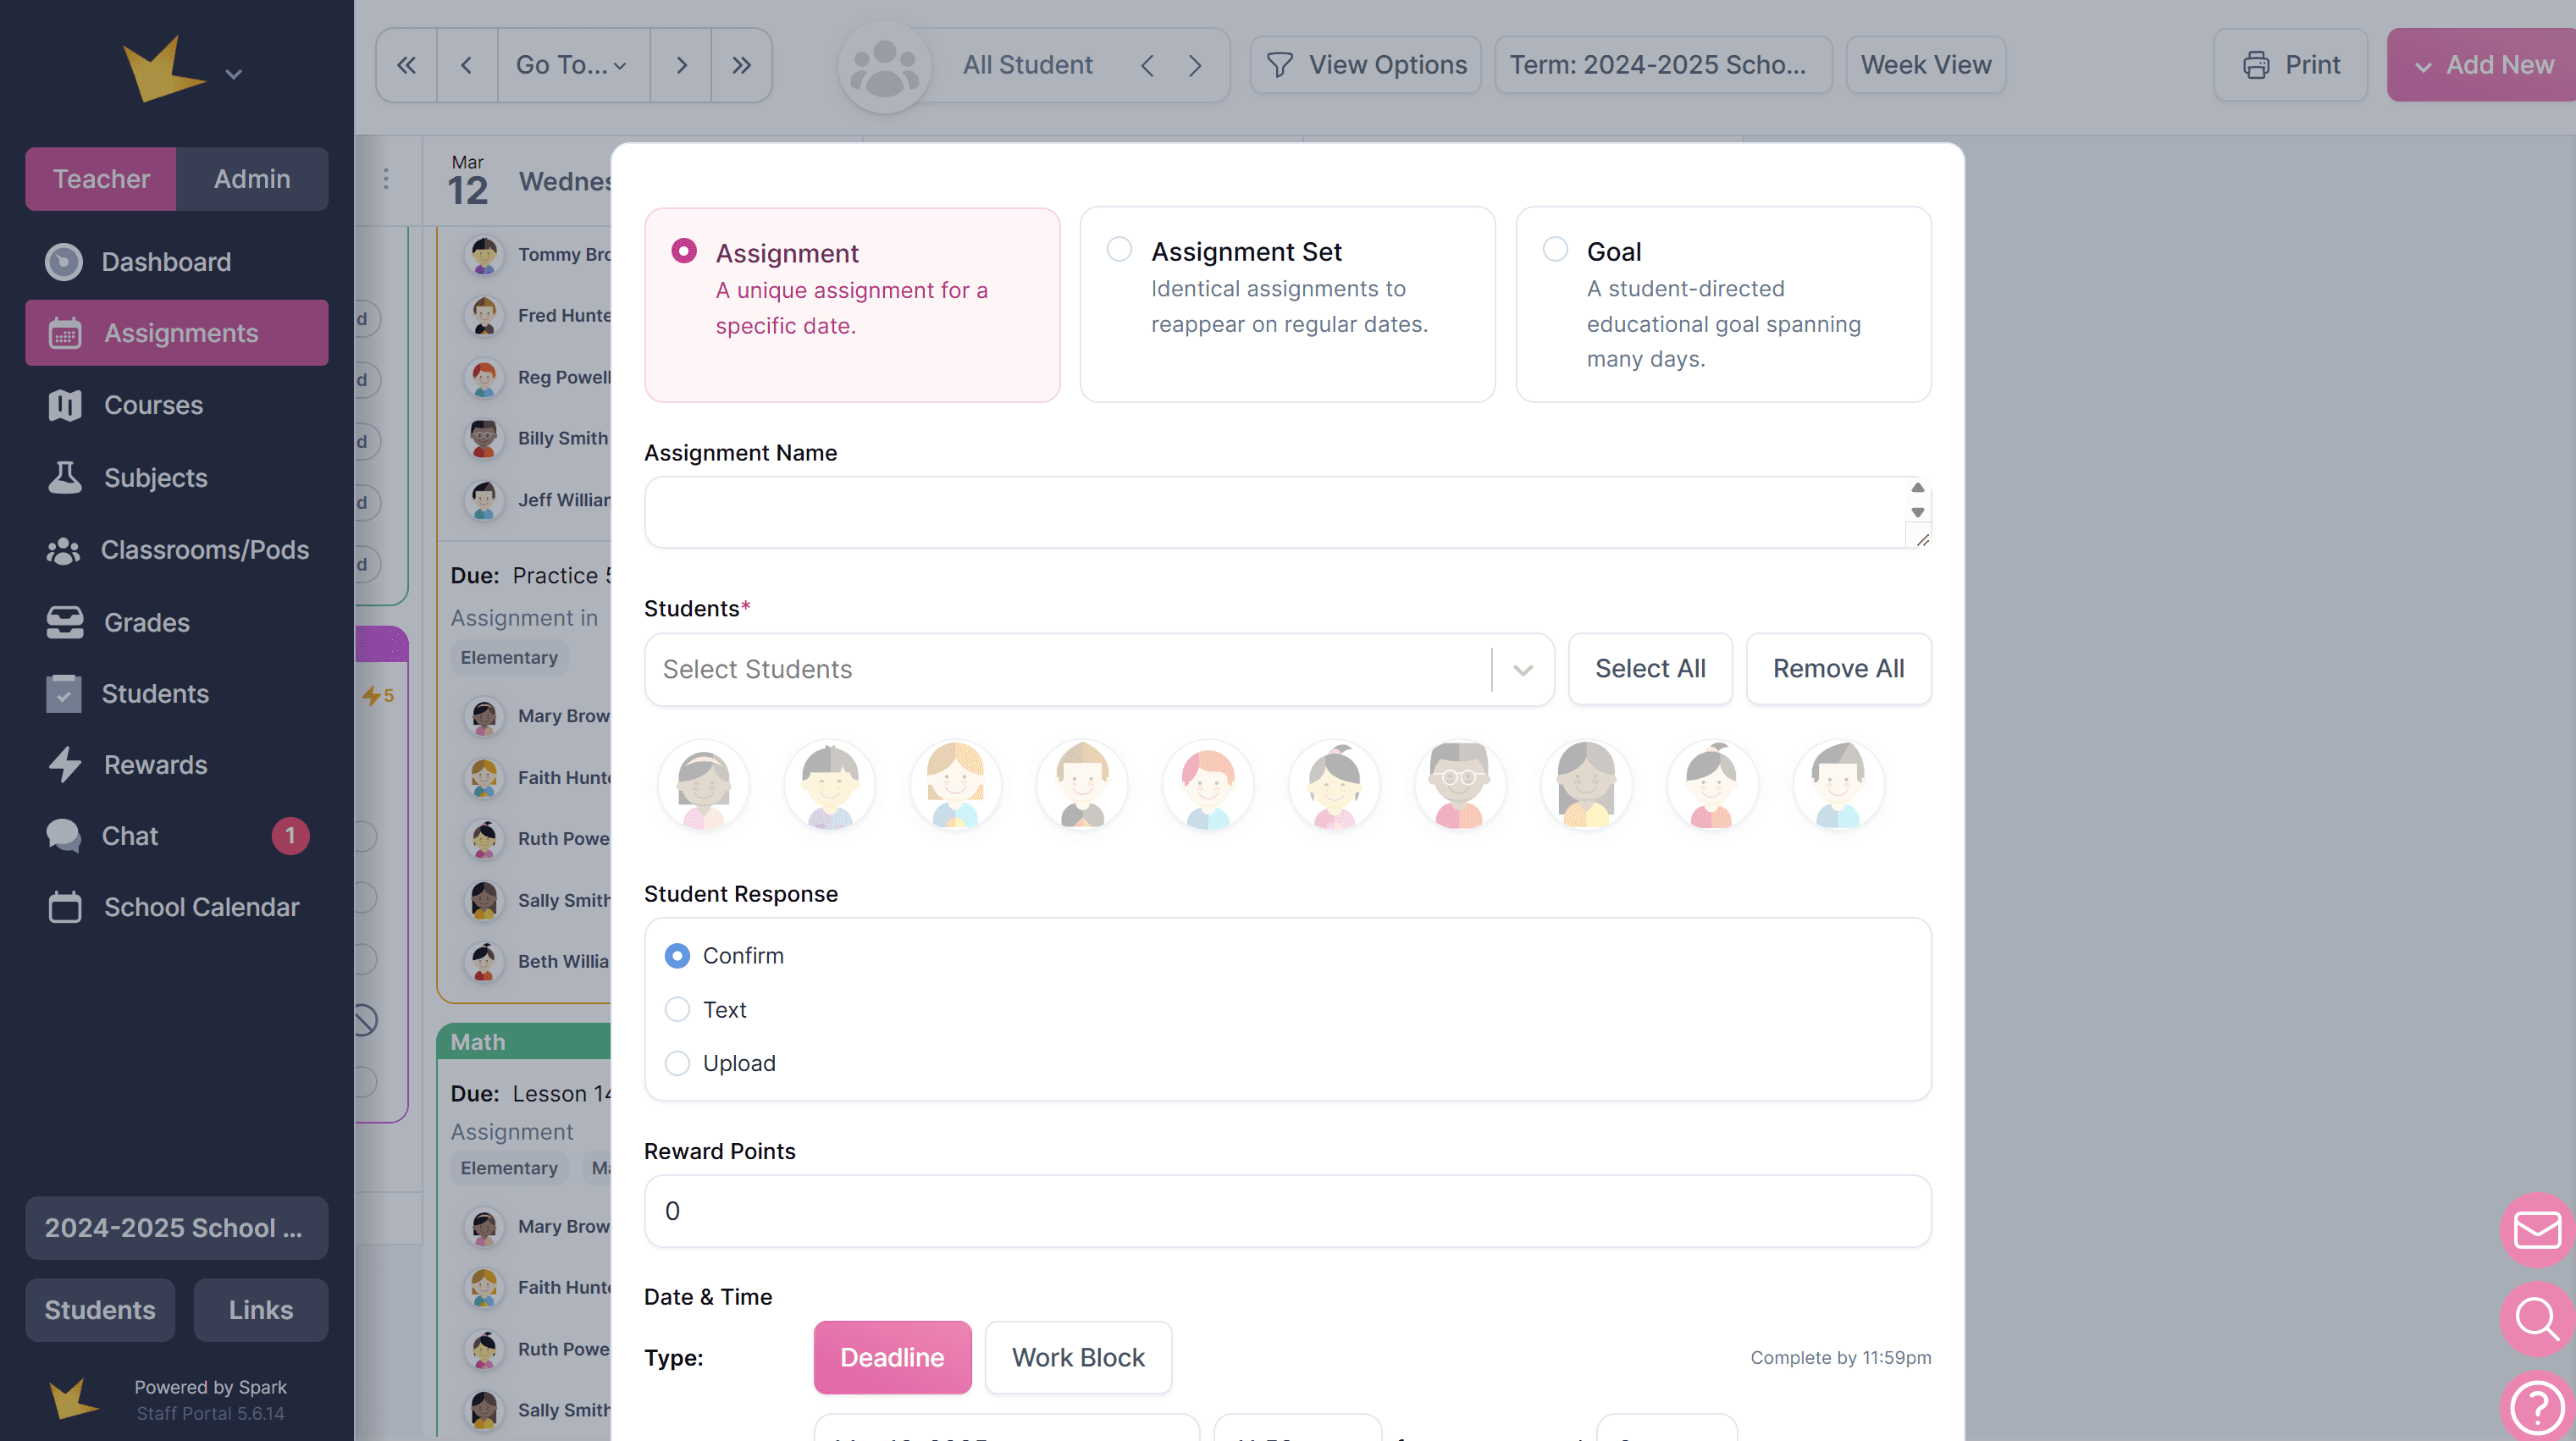
- Access the Assignment or Goal Modal
- Navigate to one of the spots where assignments can be created: the Student Planner or Assignments list (under Learning or within a classroom), or the Class Stream in a classroom.
- Click Add New at the top-right or hover over a date and press +Assignment when on the Student Planner.
- Select the type of item to create: Assignment, Assignment Set, or Goal.
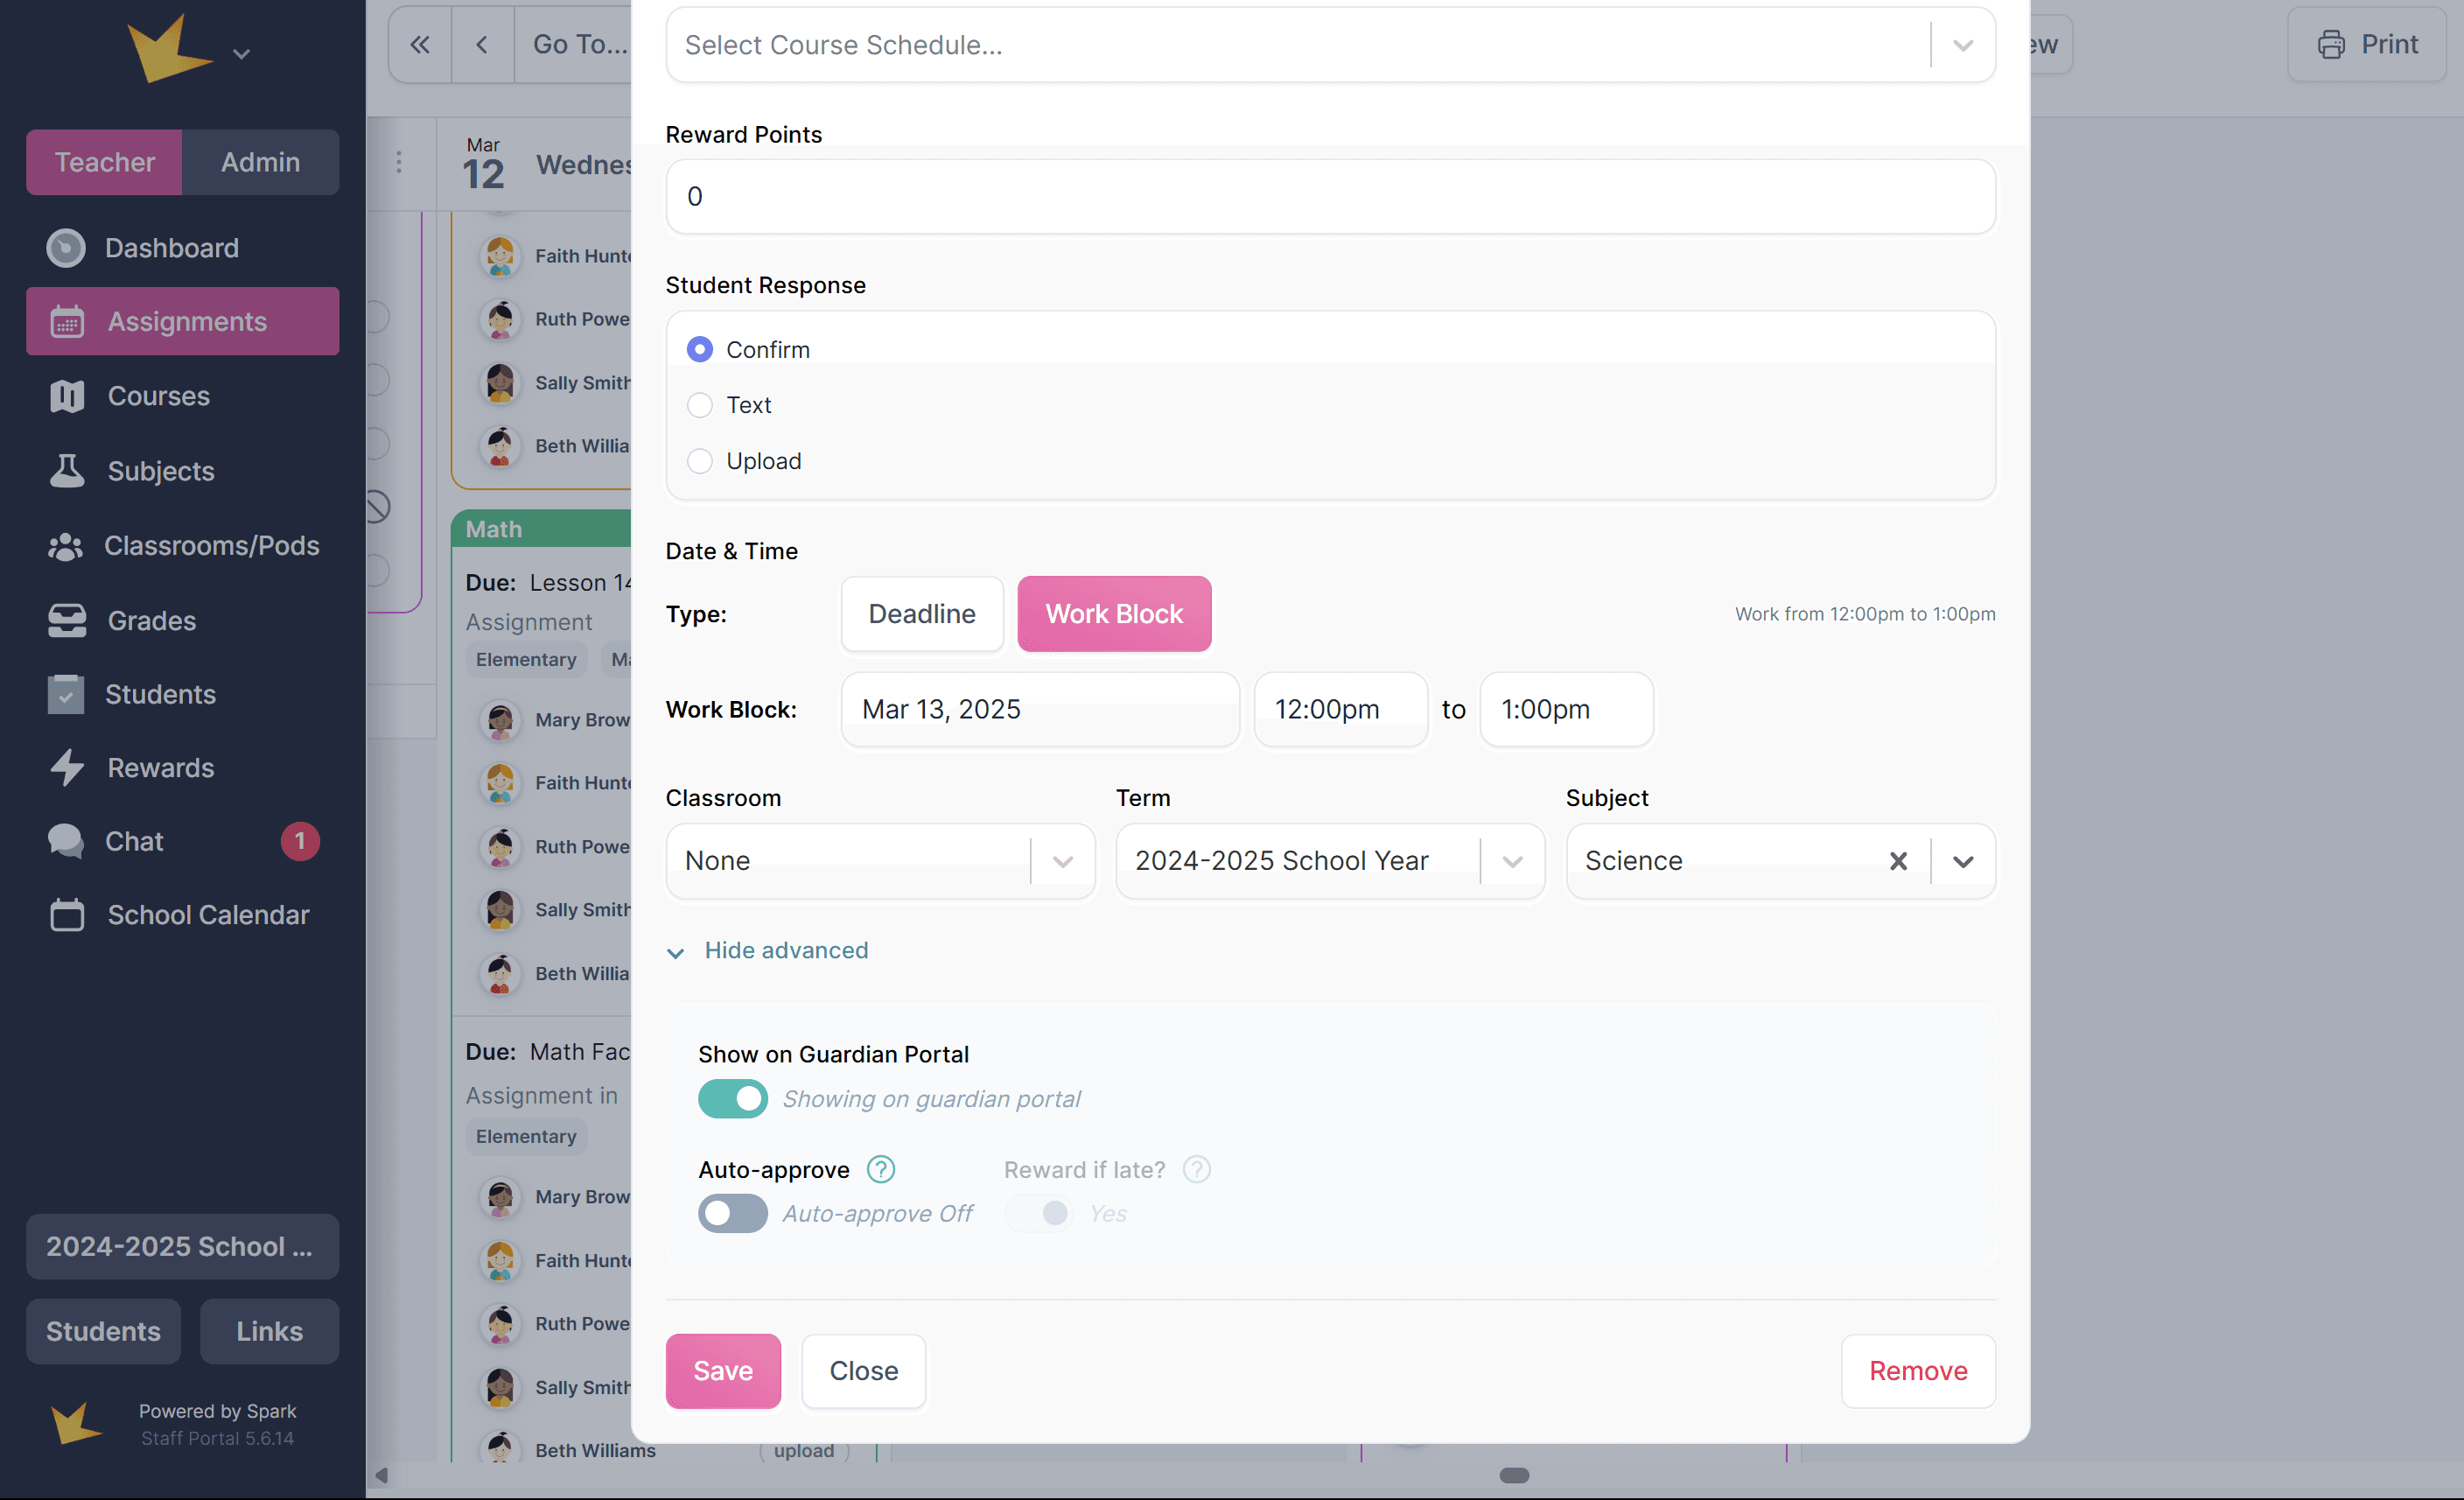
- Enter Details. Details include
- Assignment name
- Sessions
- Classroom
- Subject
- Topic
- Reward points
- Students
- Student response
- Grades
- Time & Date
- Click Create or Create & View.
- If you select Create & View, a modal will open to allow further edits, including instructions, attachments, or additional details.
Once the assignment or goal is created, it will appear on the student planner and can be modified, moved, copied, or deleted.
Response Types
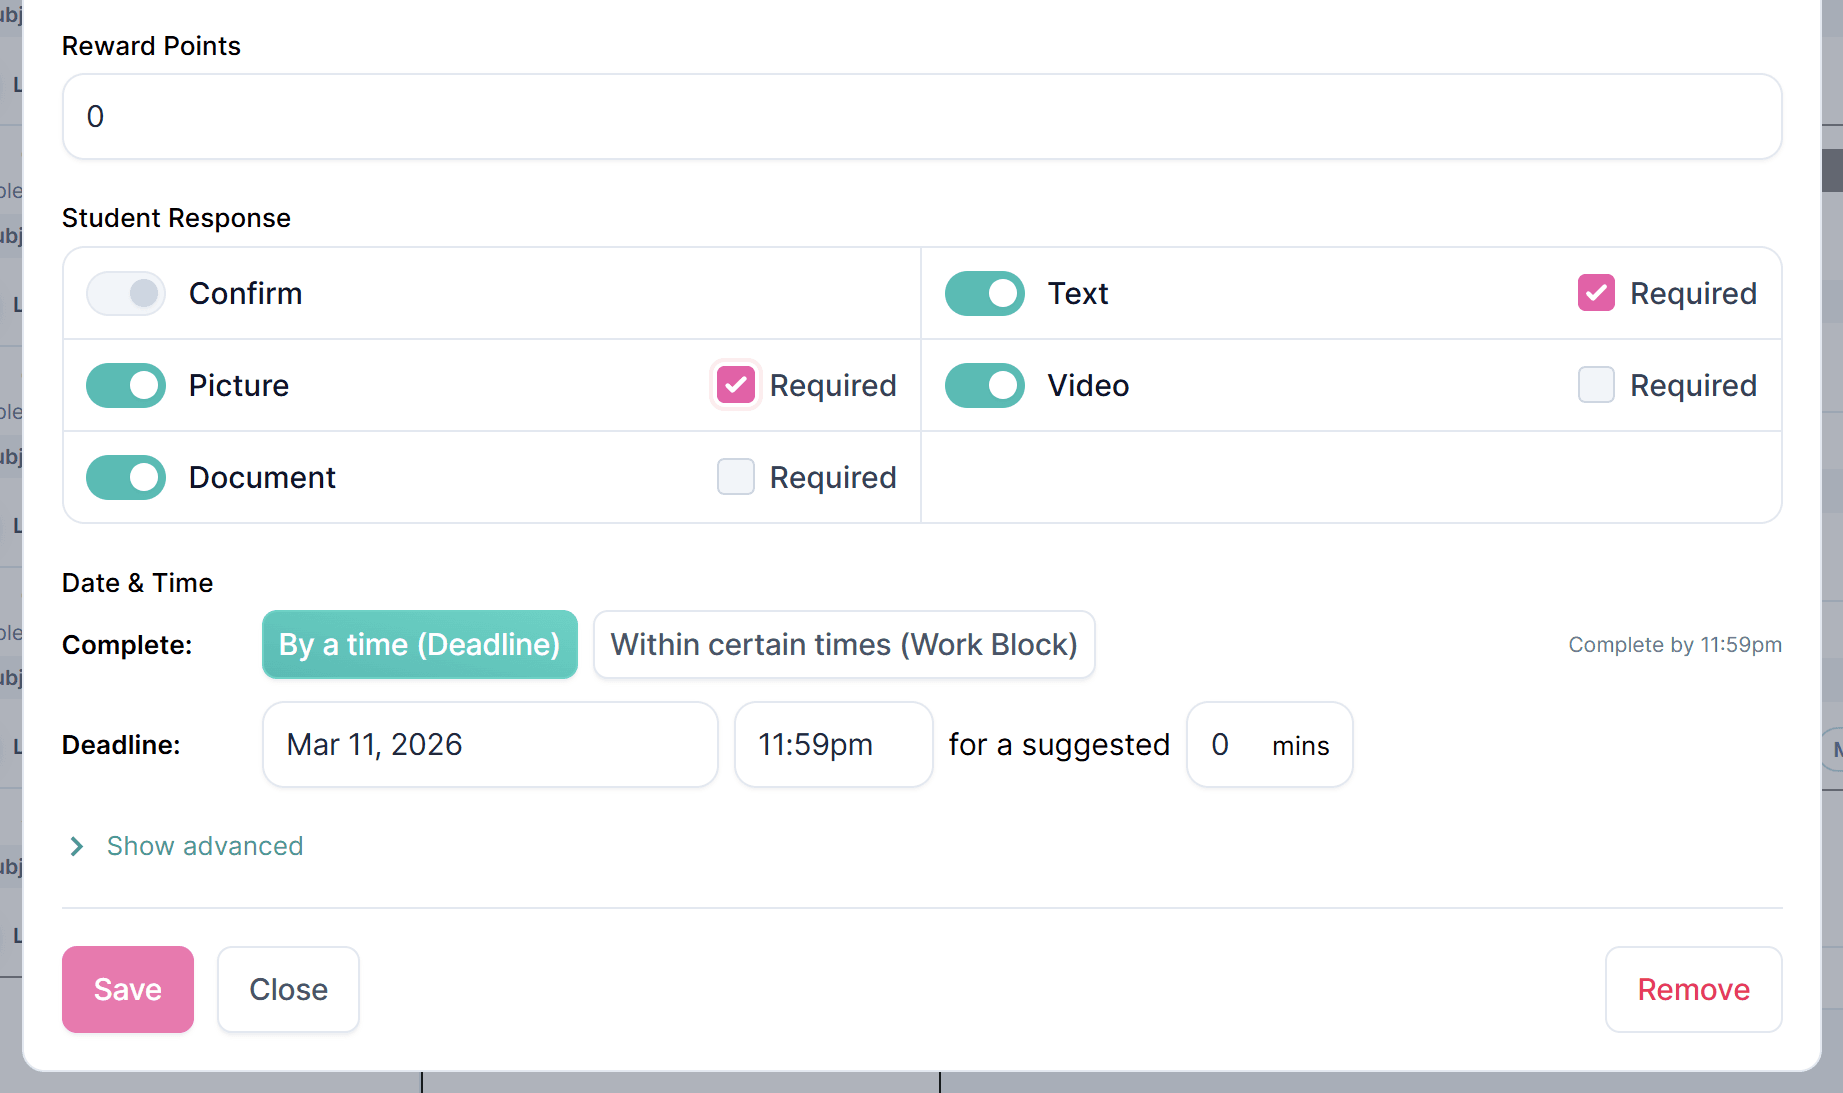
Students have several ways to respond to an assignment. By default, students simply confirm that the assignment was completed. However, you can also allow them to:
- Type a text response to a question or prompt
- Upload a photo
- Upload a video
- Upload a document
When creating an assignment or goal, you can choose which response type(s) students should submit. You may select multiple response types and mark each one as required or optional.
If no response types are selected, students will only need to confirm completion.
Grades
An assignment, set, or goal can be added to a Grade Record when it is first created.
- Scroll to the Grades section.
- Select an existing Grade Record, or select Create New Grade Record.
If you create a new Grade Record, enter the following:
- Name
- Grading Strategy
- Grading Scale
If the assignment, set, or goal is part of a Classroom, the new Grade Record will automatically be added to that classroom's Grades.
If you select an existing Grade Record, specify the appropriate Weight Category or Points for the assignment, set, or goal.
Adding Instructions, Attachments, and Links
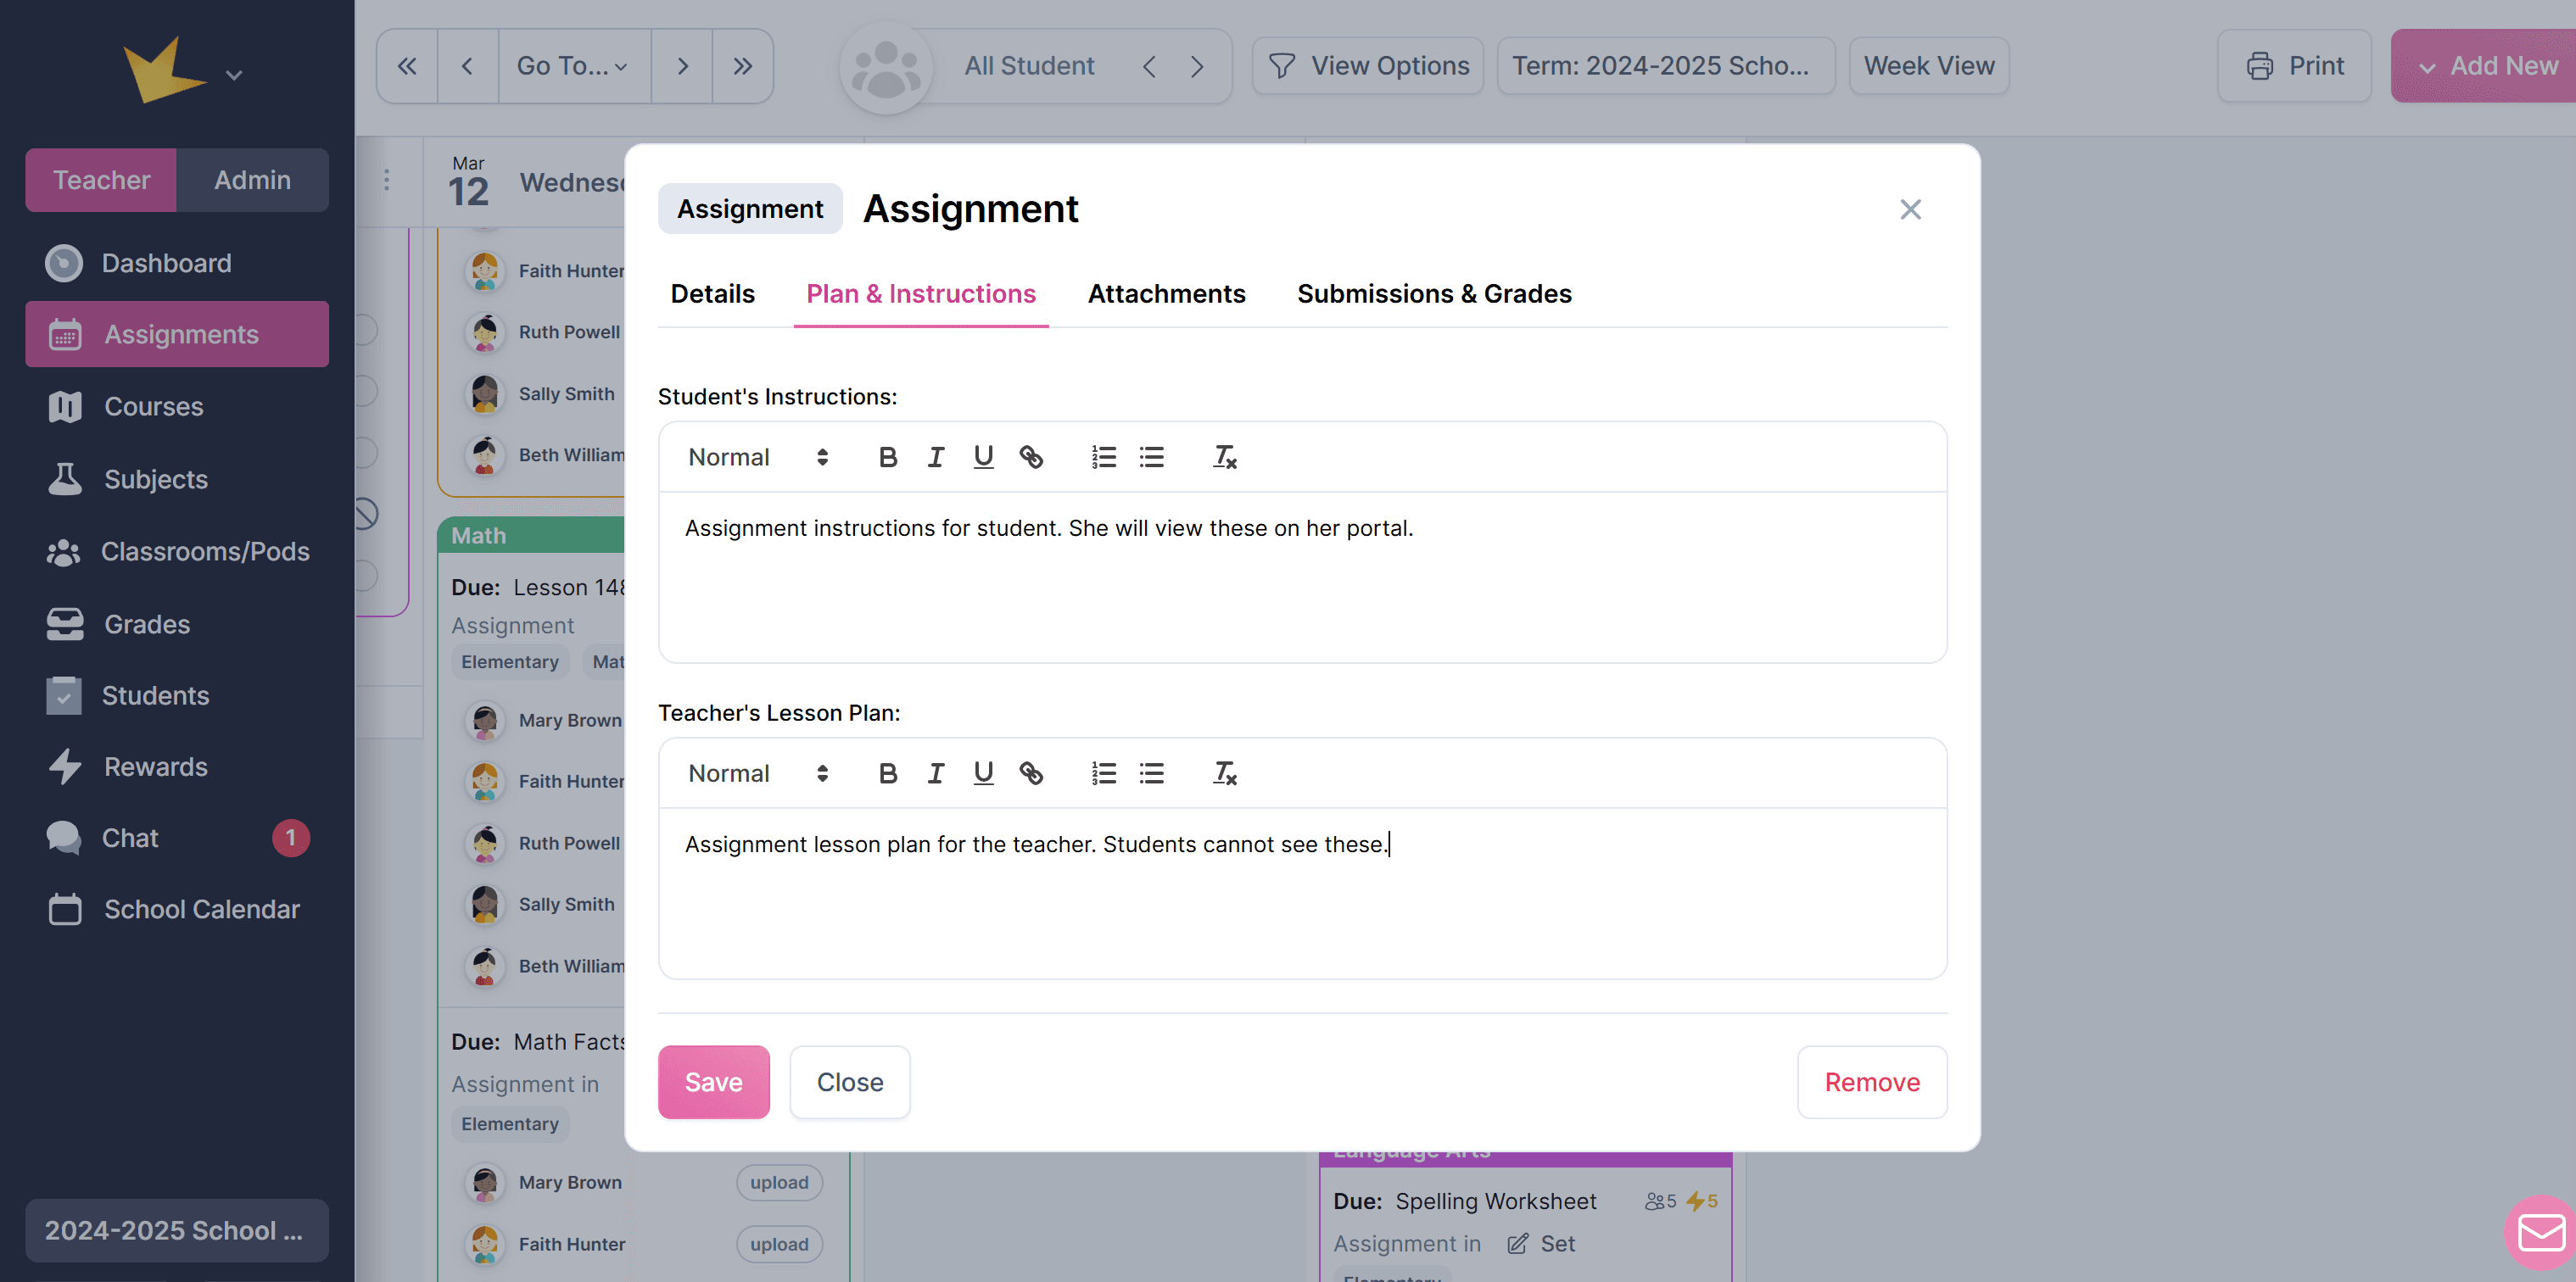
To add instructions, attachments, or links, use the Instructions and Attachments tabs in the assignment.
- After creating an assignment or goal, click Create & View to access the Instructions or Attachments tab.
- Add or update instructions or attachments for an already created assignment by clicking the assignment on the calendar to open, then accessing the Instructions or Attachments tabs.
Instructions Tab
- Use the fields in this tab to create instructions that will be visible to students on their portal.
- Additionally, you can create lesson plans here for your personal use only.
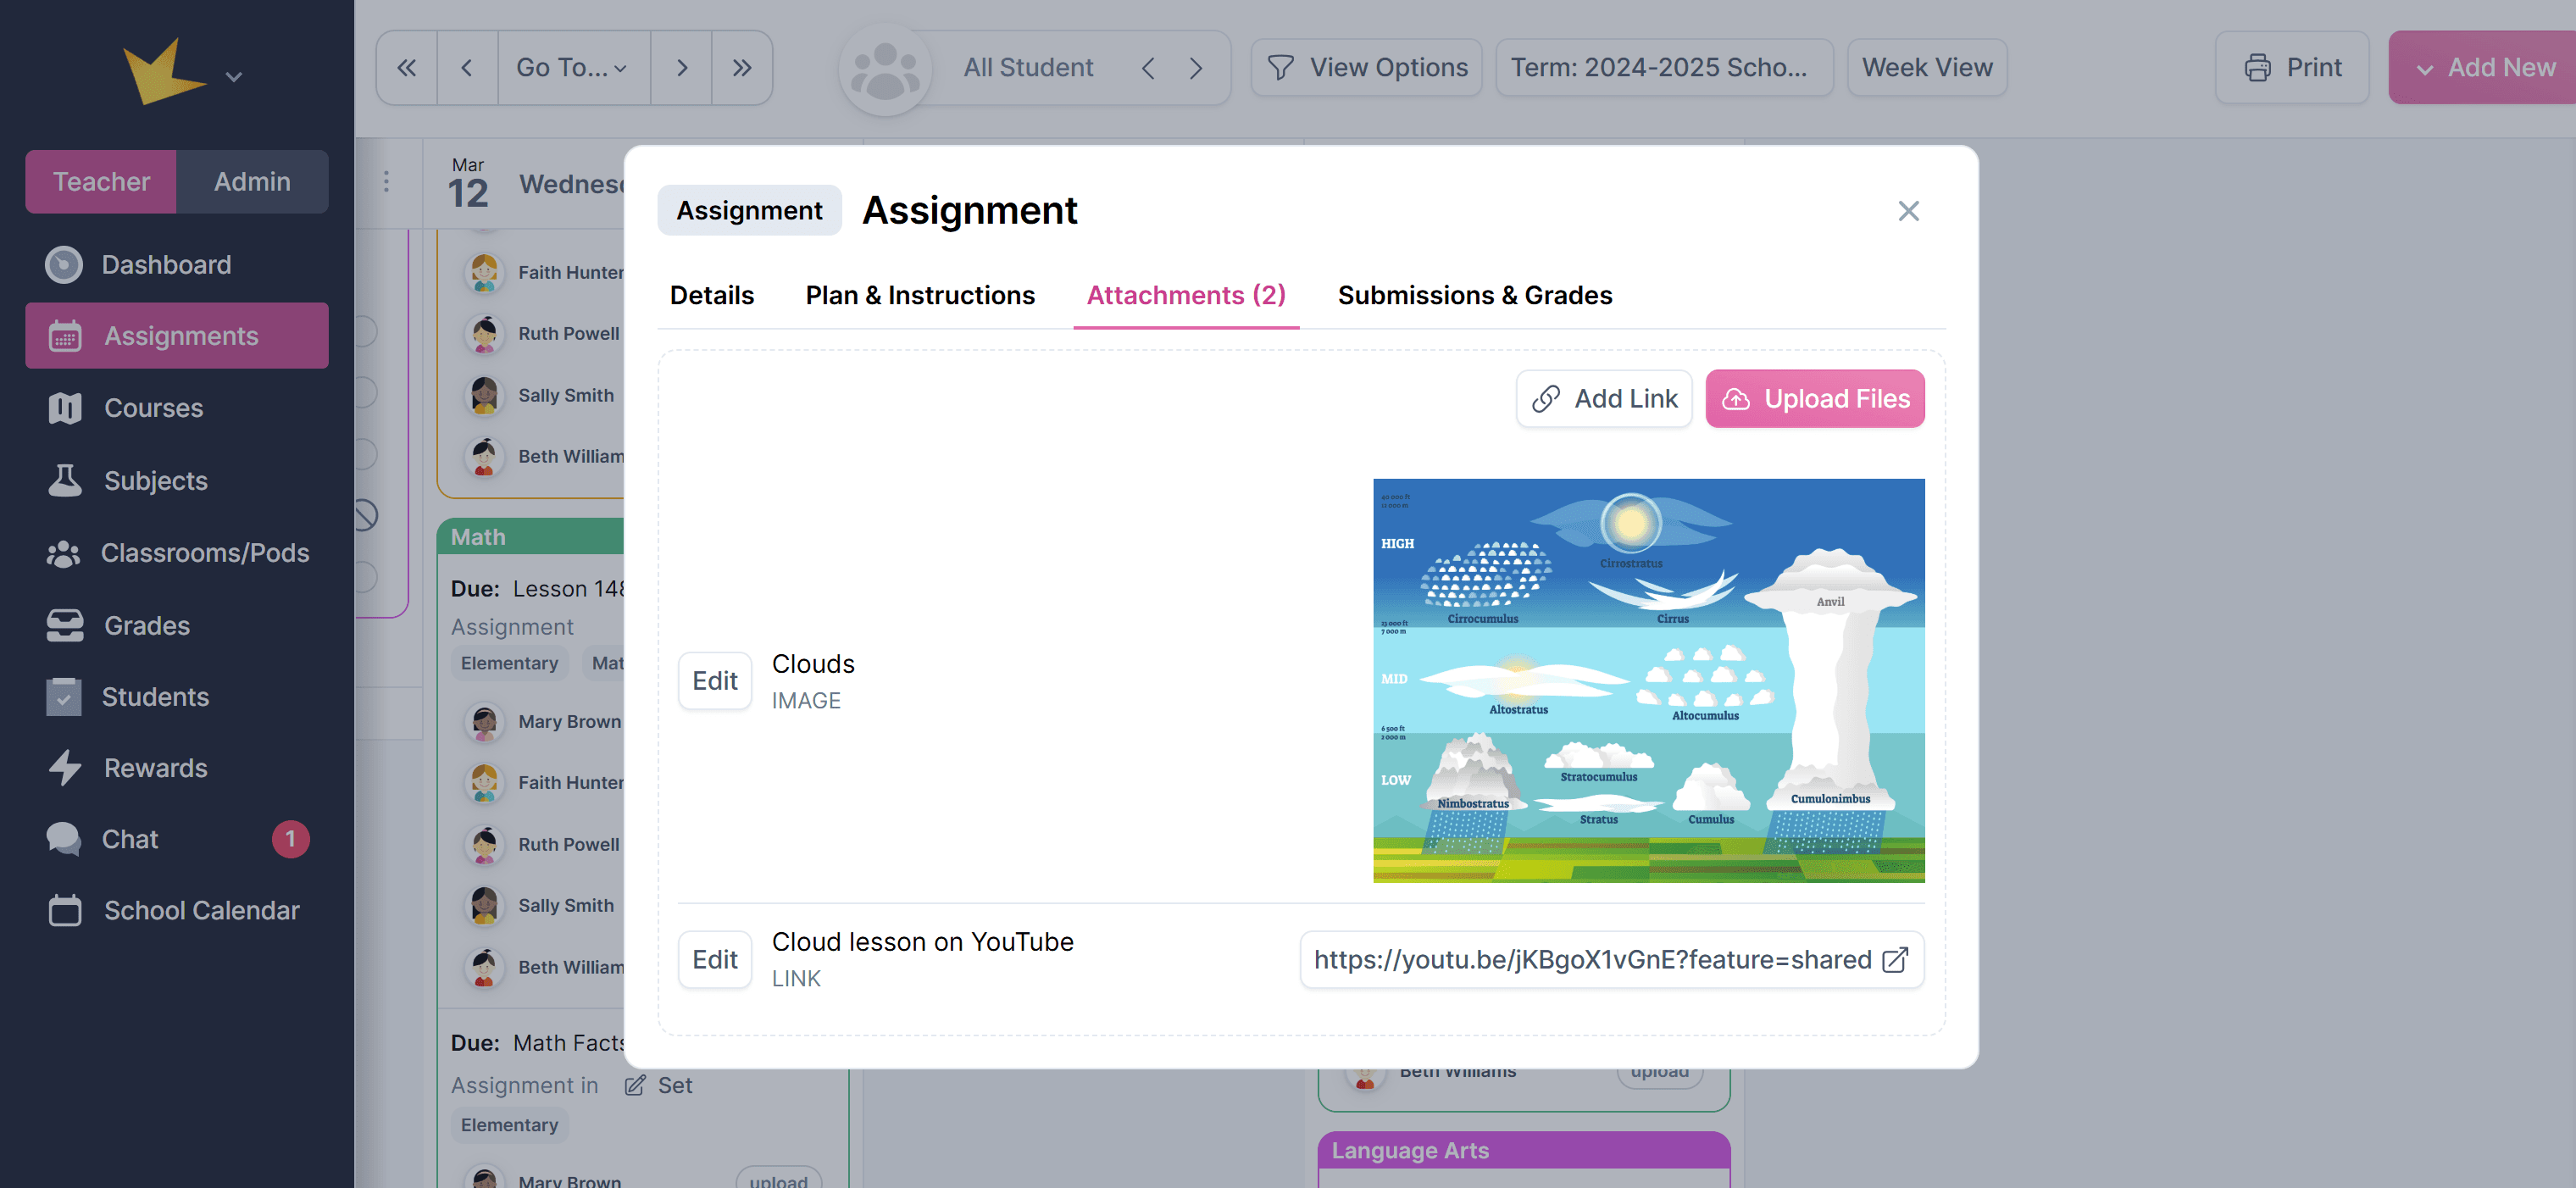
Attachments Tab
- Use the Attachments tab to upload resources, such as PDFs, Word documents, images, or videos.
- In the same Attachments tab, you can add Links to external resources, such as websites or video conference links.
Additional Settings
Deadlines and Work Blocks:
- Deadlines: Set a completion time, typically by the end of the day.
- Work Blocks: Specify a time block for students to work on the task.
- Assignments are displayed chronologically based on these settings.
Guardian Portal Visibility:
- Use the Advanced Settings → Show on Guardian Portal toggle to make assignments visible to guardians.
- Guardians can view, but not edit, assignments, activities, or events.
Auto-Approve:
- When enabled (under Advanced Settings), student submissions are automatically approved without teacher review.
- Use the Reward if Late option to decide whether points are awarded for late submissions.